Items
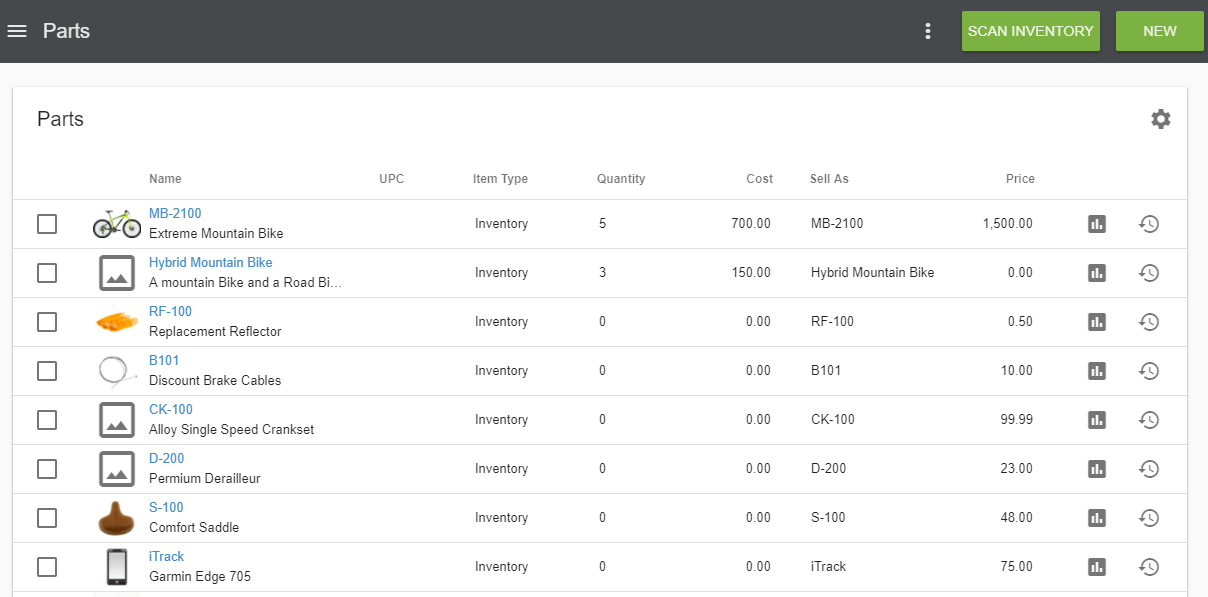
Items are the products that your company sells and may be Inventory, Service, or Shipping types. The Items module keeps a record of inventory items, as well as a convenient place to see the Cost and Price of an item. In the Settings module, the name of your item is customizable and can be renamed to fit your company’s particular process flow. (The screenshot on the left shows the name change from “Items” to “Parts.”)
- Please see Inventory for information or questions regarding inventory control.
- You can also read a detailed description of how to import items into your database by batch here: Import Items Using a CSV File.
Create an Item
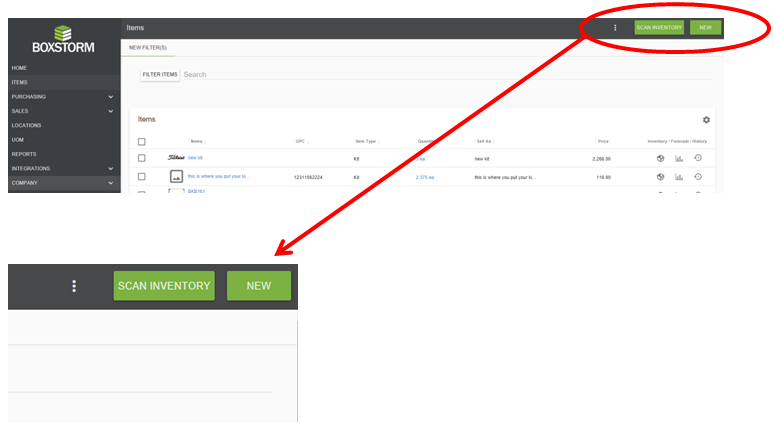
To create an item, click the New button located in the upper right hand corner of your screen. Required fields are marked with an asterisk. Or you may Import items using a CSV spreadsheet file. The Item box has 5 different tabs: Item, Details, Locations, Reorder Points, and Images. Detailed information on each of these tabs is outlined below.
Item Tab
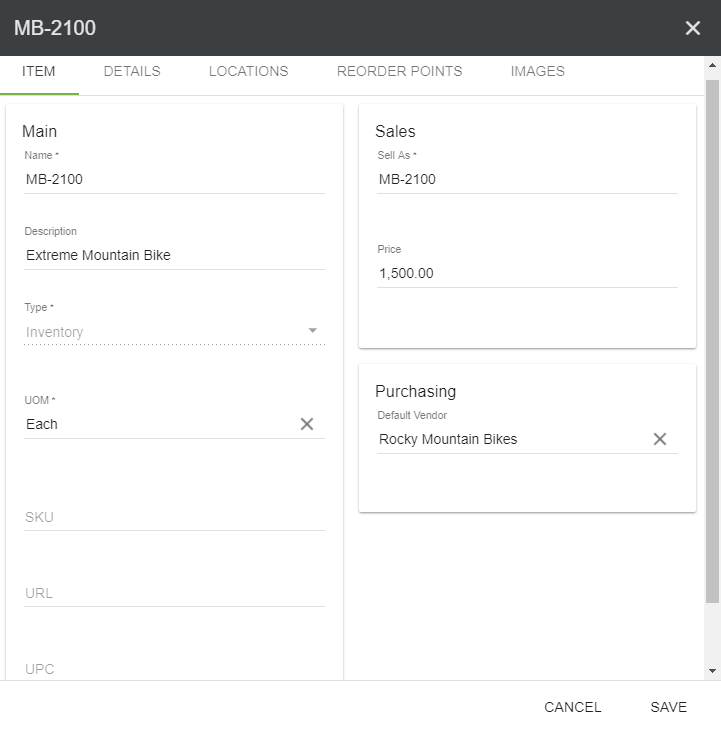
The Item tab has 3 sections and is explained as follows:
- The Main section holds the Item’s Name, Description, UOM, SKU, URL, and UPC. The Name, Type, and UOM are all required fields. The description and extra tracking are optional. Each is the default Unit of Measure, but additional UOMs may be created in the UOM module.
- The Inventory Types include 3 different options:
- Inventory – Can be purchased, sold, and IS stocked in inventory.
- Service – Can be purchased and sold but is not stocked in inventory.
- Shipping – Can be purchased or sold but is not stocked in inventory.
- The Sales section holds the Item Name and Sales Price to be shown on the Sales Order.
- The Purchasing section is where a default vendor can be set for the item. This default vendor is the vendor used to create an automatic Purchase Order if reorder points are set up.
Details Tab
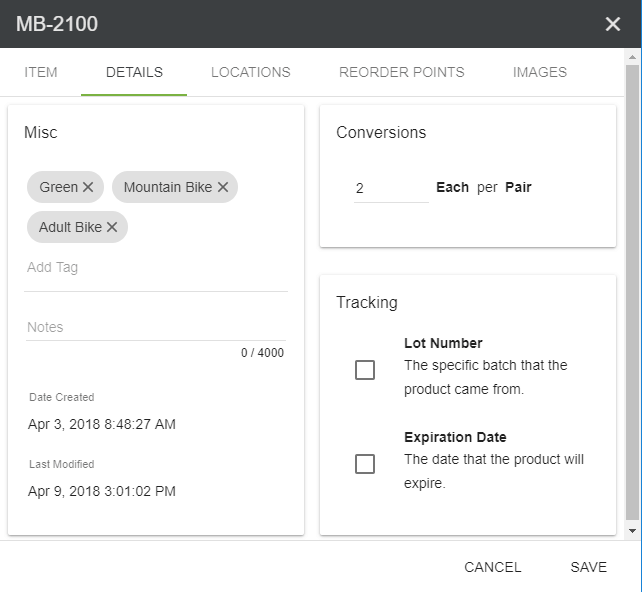
The Details tab has 3 sections: Tracking, Conversions, and Miscellaneous.
- Tags are used to categorize inventory items (ex: color, size, brand, type). They can be used to filter some reports (such as Inventory On Hand) and can be used to view stock in the Items list or download and email a PDF stock report to clients.
- Unit of Measure conversions will default to the values set in the Units of Measure module but can be customized on a per-item basis.
- Tracking fields can be created in the Settings module. Lot Number and Expiration Date are default tracking fields. However, additional fields may be created in the Settings module, Item tab.
- The Misc section is where notes associated with the item can be added. It also shows you a timestamp of when the item info was last modified.
Locations Tab
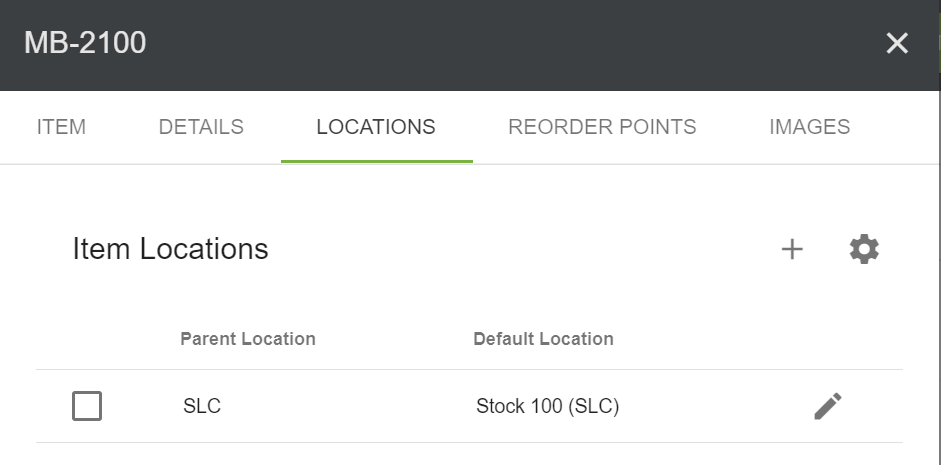
The default location in Boxstorm is Main. Items are assigned to a Location in this tab. However, the locations must have previously been created in the Locations module.
- The Locations tab is where default locations can be set for the item. Main is a default location, but any other Locations must first be created in the Locations module. Items must be assigned both a Parent AND Default Location.
Reorder Points Tab
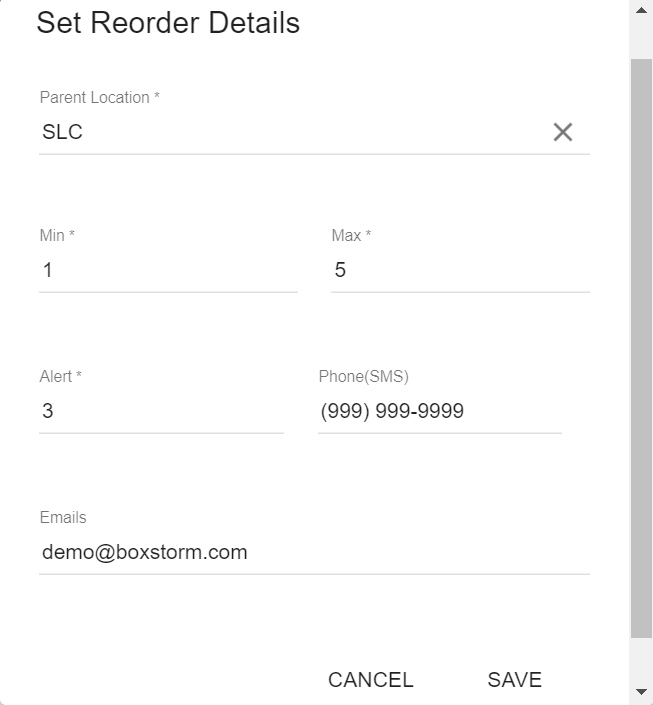
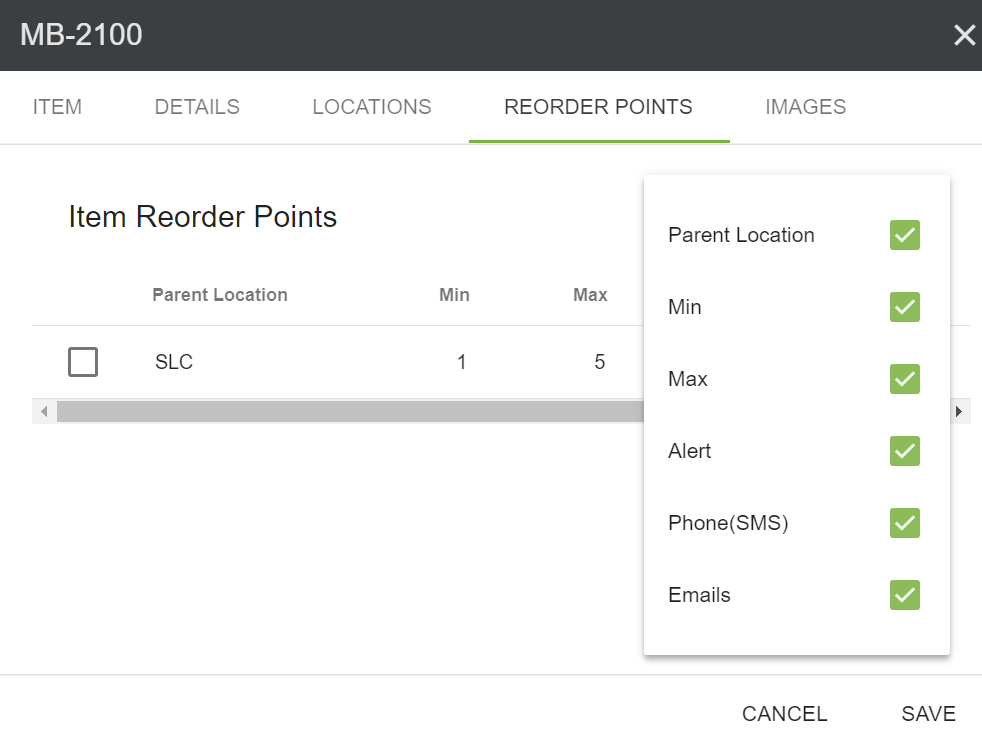
1. Reorder Points allow you to set min, max, and alert levels for each of your parent locations. If a phone number or email address is provided, a notification will be sent when the total inventory on hand for that location reaches the alert and minimum levels.
- To create a new Reorder Point, choose the
 icon. The
Set Reorder Details box will be displayed where you can set the Parent
Location, Minimum and
Maximum levels, as well as an alert level. Notifications will be sent to the phone or email
information
provided when the inventory reaches the levels specified.
Images Tab
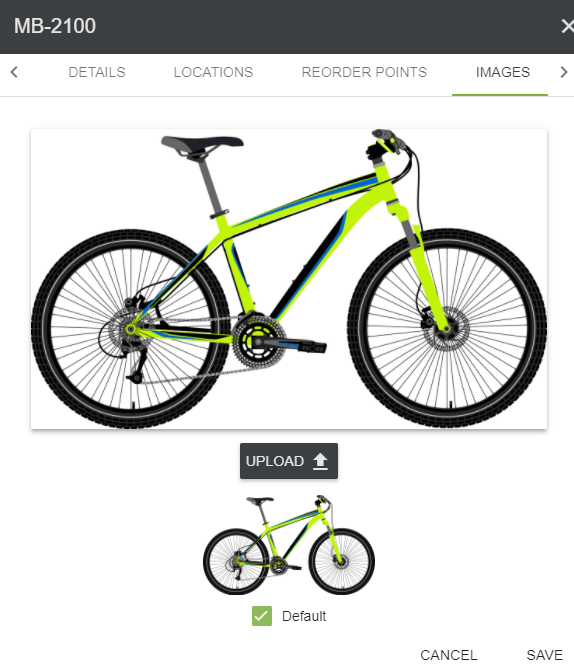
Boxstorm allows each item to have multiple images. The image uploaded here will be displayed for the item on the Items home page list, Sales Order, and Reports. A default image must be selected and can be chosen by checking the default box below the desired image.
Add Inventory to an Item
Inventory is not added to an item during its initial creation unless you enter the inventory during a CSV import. Instead, it is added from the Items home page once an item has been saved. Please see the Inventory page for detailed information on how to add inventory.
Scan Inventory
From within the Boxstorm website, you can scan inventory in or out using a Bluetooth or corded scanner. (If you need a scanner, you can visit our hardware store for pricing and purchase options.) It is recommended to do a CSV import or manually enter your inventory prior to using the Scan module.
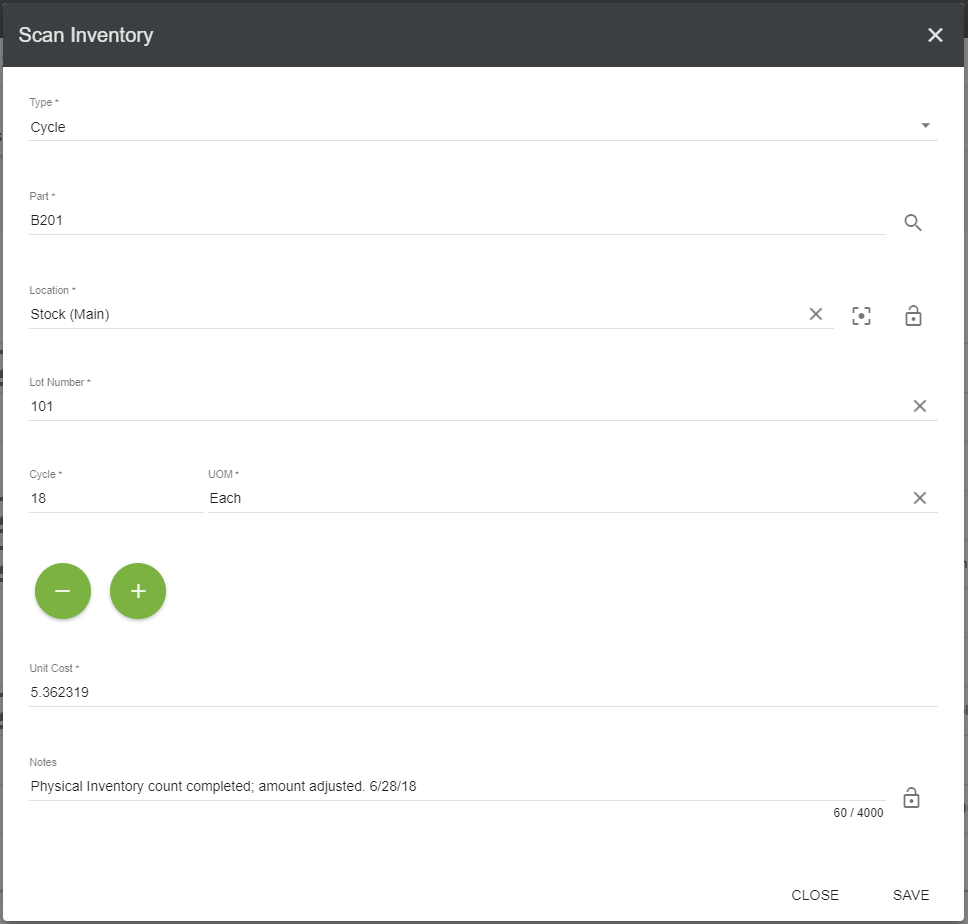
To scan items, click the Scan Inventory button located in the top right corner of the Items module home page. Information is entered using a scanning device or manually entered into the text field. Fields marked with an *asterisk are required. There are 4 Inventory Scan types to choose from:
- Add – This is recommended for adding initial or additional inventory.
- Remove – This is recommended for deducting inventory.
- Move – This is recommended for moving inventory from one location to another.
- Cycle – This is recommended when doing a physical inventory count, and quantity adjustments are necessary.
Scan the Item, Location, Lot Number (if Tracking), and Quantity (Quantity entered here should be the total amount). The Unit of Measure and Unit Cost are default for the specified item; however, they may manually be adjusted here. The Note field is optional. Click Save for each scanned item. Repeat this process for additional scanned items.
In addition to the scanning features on the Boxstorm website, you now have the option to manage your inventory using the scan features of the Boxstorm iOS and Android app. The app features are to be used with an existing inventory already in the Boxstorm Inventory Management system.
Edit an Item
To edit an item, click on its name. This blue hyperlink will open the item details, allowing for modification. Click Save when your changes are complete.
Search for an Item
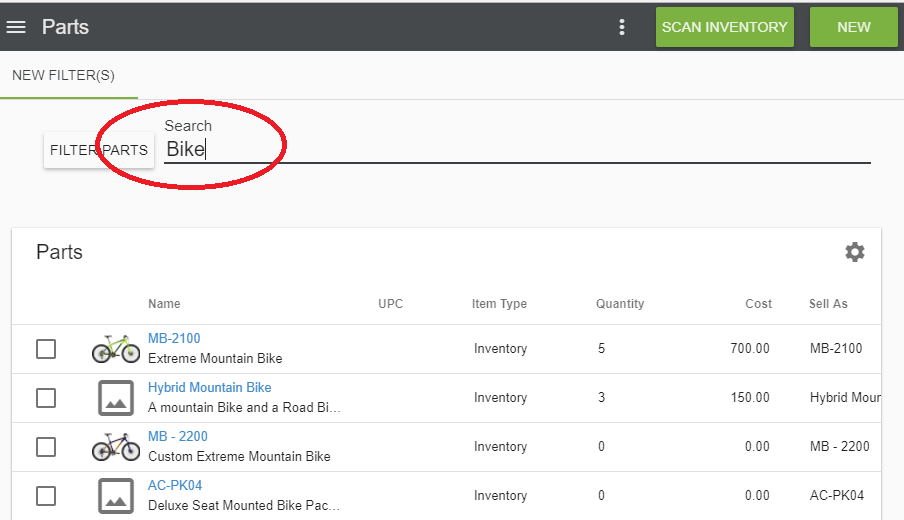
The Search field offers a quick way to find an item. Items can be searched by almost any information assigned to them, including their Name, Item Type, and Description.
Filter Search
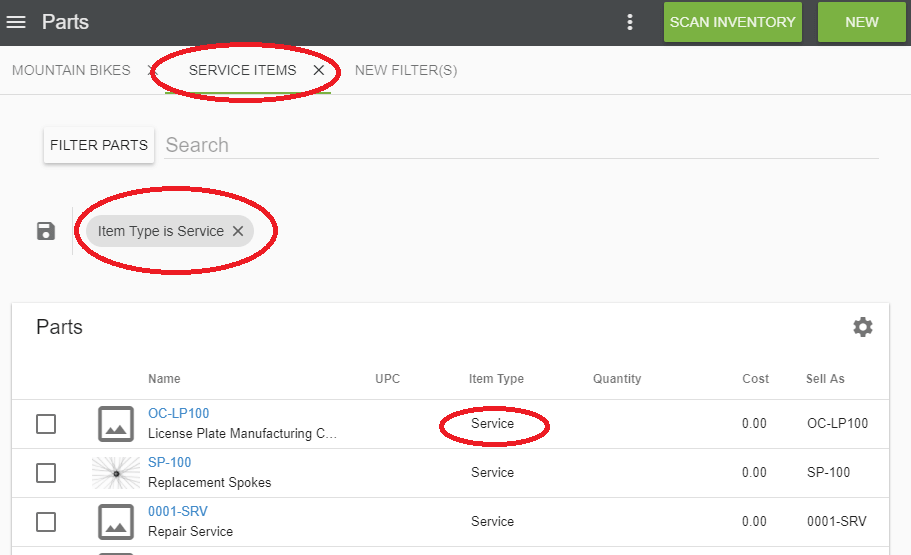
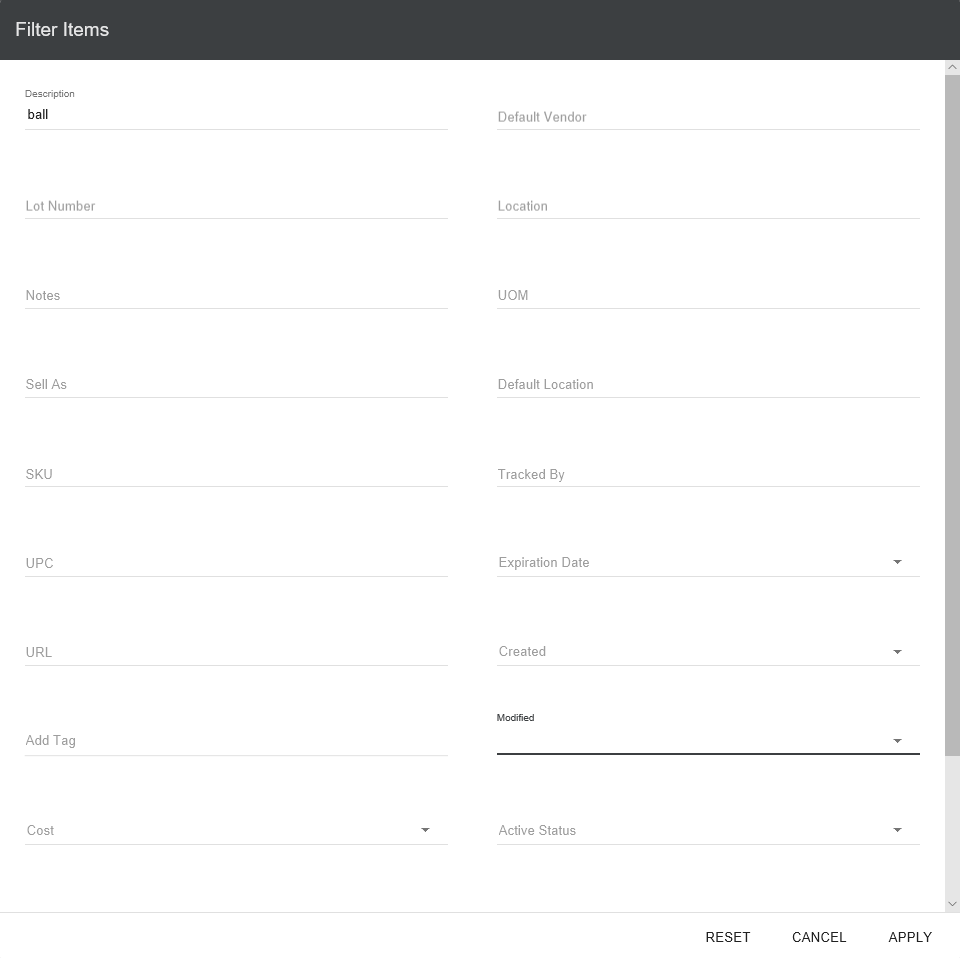
1. A Filter Items search allows you to filter your items based on a variety of different options. To do so, choose the Filter Items button located next to the Search field. Choose how you would like to filter your items and click Apply. Multiple filter options may be applied.
2. Once the filters have been chosen, click
![]() Save. This will save these options for future use. To load a previously saved
filter, select the
filter tab from the top of the screen. To create a new set of filters, choose the
New Filter(s) option again.
Save. This will save these options for future use. To load a previously saved
filter, select the
filter tab from the top of the screen. To create a new set of filters, choose the
New Filter(s) option again.
History of an Item
1.
To see the history of an item, click the
![]() Show History button, then select
Item.
Show History button, then select
Item.
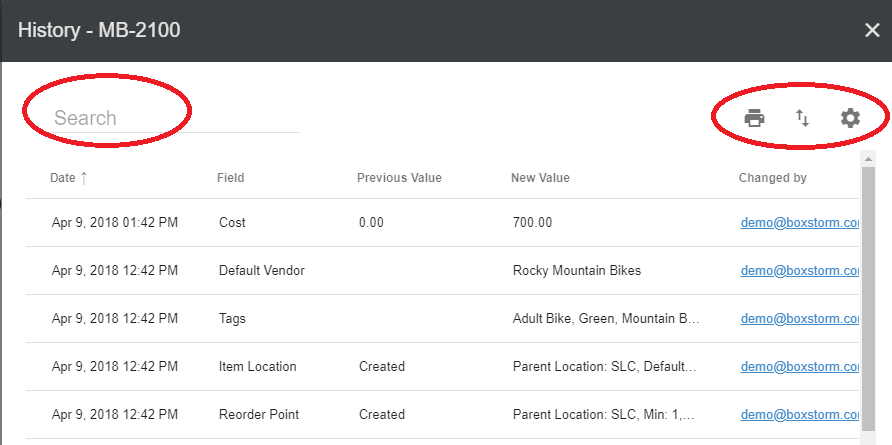
2. Any history of the item will be shown here, along with the date and user who made the changes. The following features are also available through the History page:
- The History page can be filtered using the Search field.
- Click a column header to sort the table.
- Click the
 Column Settings button to customize the columns that are visible.
 - Click the
 Print button to print the current view.
 - Click the
 Export to CSV button to export the current view.
Item Imports and Exports
Boxstorm can import and export information through Comma Separated Values (CSV) files. CSV files can be viewed and edited in spreadsheet applications like Microsoft Excel, or in any text editor. Boxstorm can also import data from TXT, XLS, and XLSX files.
- Imports provide a convenient way to bring external data into Boxstorm (update a vendor part list, import an order from an online shopping cart, etc.)
- Exports allow Boxstorm data to be used externally (update a website with product prices, export a list of customers, etc.)
The following steps outline the basic use of imports and exports. From the module tab, click the three vertical dots at the top-right of the Boxstorm Client and choose Import or Export. Boxstorm can export the filtered list in the current search, or the entire Inventory list. The exported spreadsheet can be found in the lower left corner of your screen, or where your downloads are located.
From within the individual modules, you can import/export the following data sets: Item, Default Location, Reorder Point, Inventory Add, and Inventory Cycle.
Import Items
Once you have selected the Import Item feature, the following dialogue window will appear. There are 4 steps that need to occur so as to successfully import your inventory file.
STEP 1: Upload File
Choose a file you already have prepared with your inventory items, or download a sample CSV file to prepare for upload.
RECOMMENDED: Download the CSV file to make sure that the column headers in your inventory record match the CSV headers to import into Boxstorm with little modification.
STEP 2: Match Columns
After importing your CSV file, Boxstorm will display the columns to be imported. This allows you to select which columns you want from your file to be assigned to each field. That way, if you have your own column headers, and they don’t match the names of Boxstorm’s default headers, you can specify which header is to be assigned to each field. If there are issues uploading your inventory, you will see what errors you have on the final step. Once the import shows ALL green checkmarks, you are free to click NEXT and move forward in the import process.
STEP 3: Review Data
At this time, review the import data. This is to ensure that once the formatting has been accepted, the columns and headers match the inventory you are about to import into Boxstorm.
STEP 4: Import Complete
Your item inventory import is now complete. You may click DONE and begin using Boxstorm for your inventory management needs.
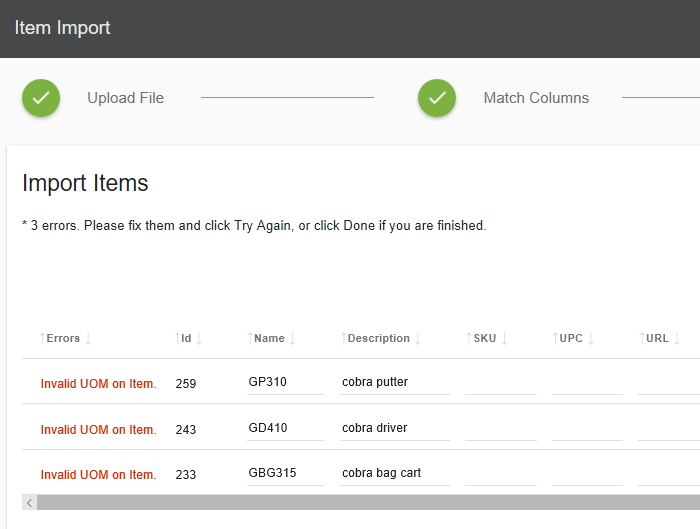
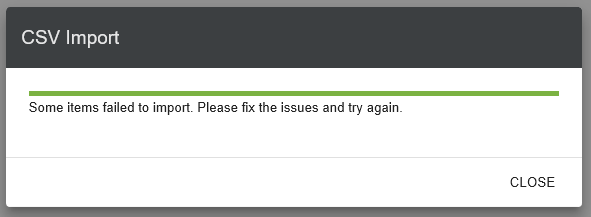
Note: If you encounter an import error, you will be prompted to fix the issues, giving you the associated error message needed for a successful import. Changes can be made on that screen, or you can download a file of just those problem records and change the data there.
Export Items
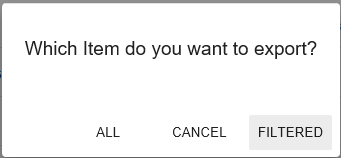
Once you have selected the Item Export feature, the following dialogue window will appear. It will give you the option to export ALL items or a FILTERED export.
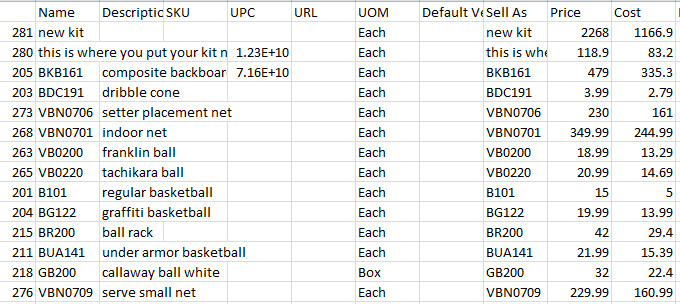
If you choose to export ALL items, you will be prompted to save or open an Excel spreadsheet with your inventory items and associated data.
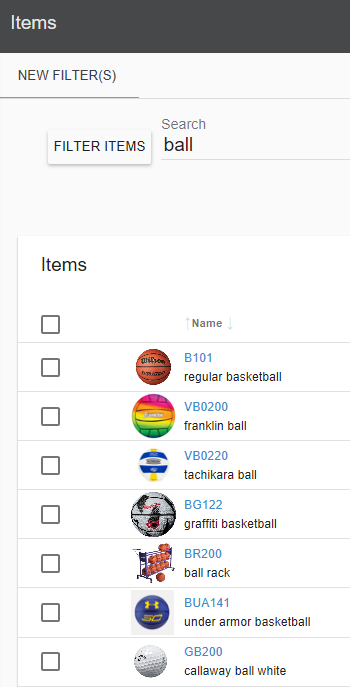
If you want to export a smaller inventory set, the FILTERED option may best suit your needs. To filter your inventory, you can enter your description into the Search field and it will auto-populate, or click the FILTER ITEMS button and choose/fill-in from the list of fields displayed.
Once you apply the filter, you will be prompted to open or save your filtered export list. This exported list is now available for your external inventory management needs.
Import Default Location
Once you have selected the Import Default Location feature, the following dialogue window will appear. There are 4 steps that need to occur so as to successfully import your default location file.
STEP 1: Upload File
Choose a file you already have prepared with your default locations, or download a sample CSV file to prepare for upload.
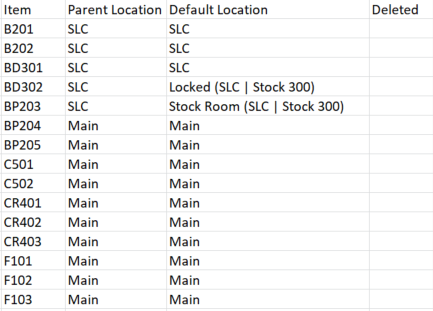
RECOMMENDED: Download the CSV file to make sure that the column headers in your inventory record match the CSV headers to import into Boxstorm with little modification. Make sure your default locations follow the same formatting as shown in the screenshot on the left, i.e. sub-locations separated by a vertical pipe and in parentheses as shown.
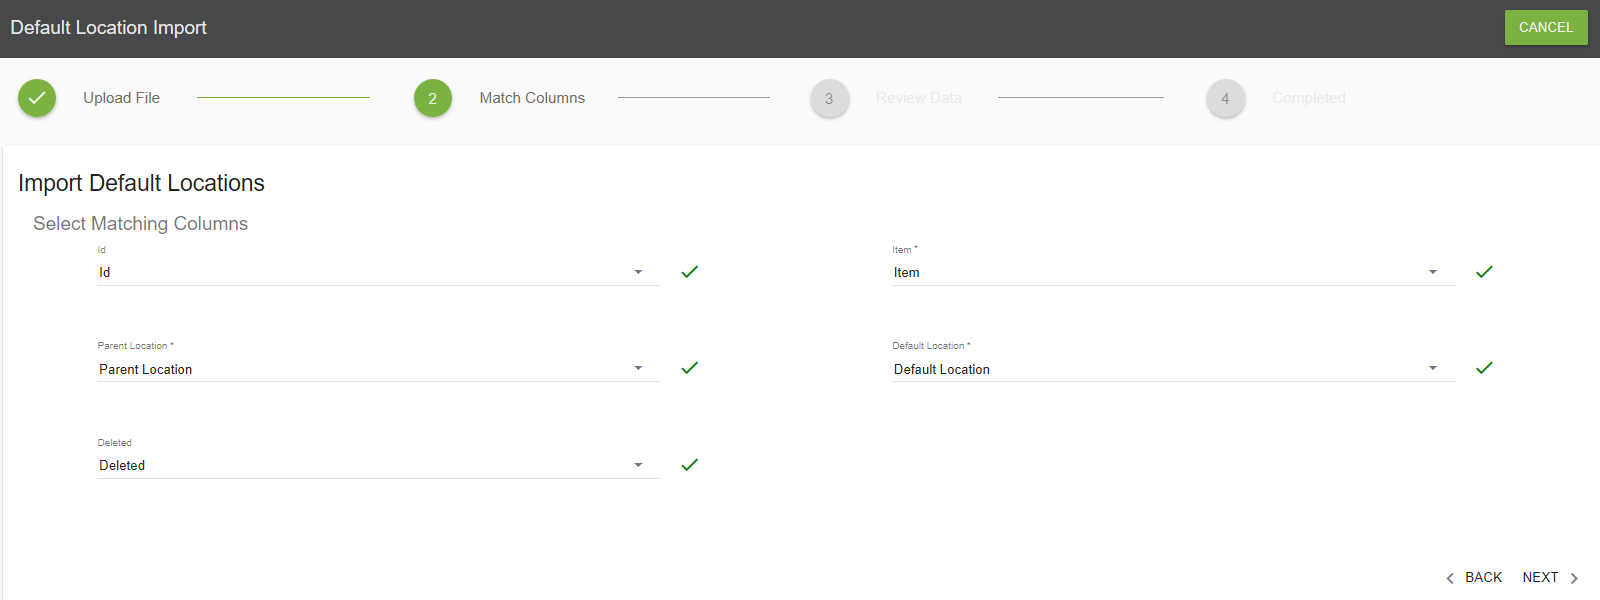
STEP 2: Match Columns
After importing your CSV file, Boxstorm will display the columns to be imported. This allows you to select which columns you want from your file to be assigned to each field. That way, if you have your own column headers, and they don’t match the names of Boxstorm’s default headers, you can specify which header is to be assigned to each field. If there are issues uploading your inventory, you will see what errors you have on the final step. Once the import shows ALL green checkmarks, you are free to click NEXT and move forward in the import process.
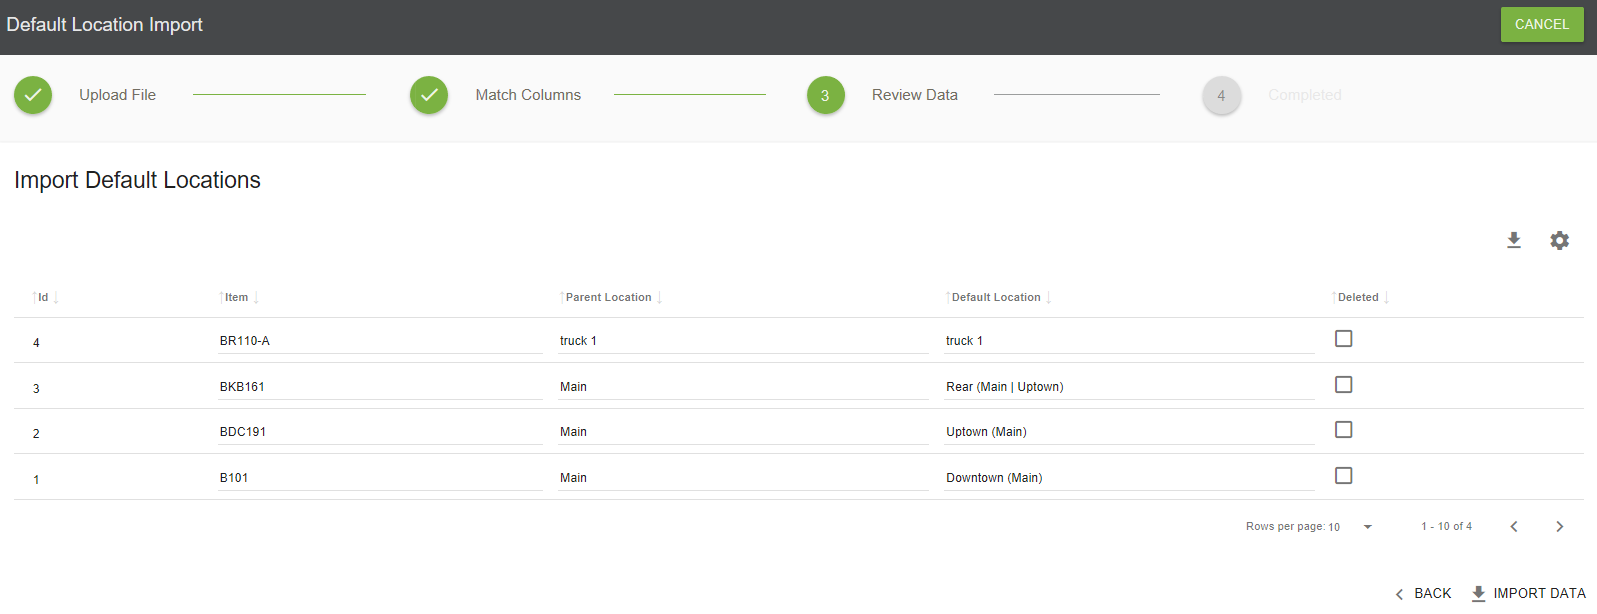
STEP 3: Review Data
At this time, review the import data. This is to ensure that once the formatting has been accepted, the columns and headers match the inventory you are about to import into Boxstorm.
STEP 4: Import Complete
Your default location import is now complete. You may click DONE and begin using Boxstorm for your inventory management needs.
Note: If you encounter an import error, you will be prompted to fix the issues, giving you the associated error message needed for a successful import. Changes can be made on that screen, or you can download a file of just those problem records and change the data there.
Export Default Location
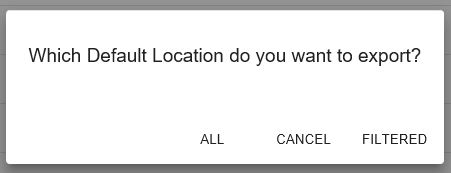
Once you have selected the Export Default Location feature, the following dialogue window will appear. It will give you the option to export ALL default locations or a FILTERED export.
If you choose to export ALL locations, you will be prompted to save or open an Excel spreadsheet with your default locations and associated data.
If you want to export a smaller inventory set, the FILTERED option may best suit your needs. To filter your inventory, you can enter your description into the Search field and it will auto-populate, or click the FILTER ITEMS button and choose/fill-in from the list of fields displayed.
Once you apply the filter, you will be prompted to open or save your filtered export list. This exported list is now available for your external inventory management needs.
Import Reorder Point
Once you have selected the Import Reorder Point feature, the following dialogue window will appear. There are 4 steps that need to occur so as to successfully import your reorder point file.
STEP 1: Upload File
Choose a file you already have prepared with your reorder points, or download a sample CSV file to prepare for upload.
RECOMMENDED: Download the CSV file to make sure that the column headers in your inventory record match the CSV headers to import into Boxstorm with little modification.
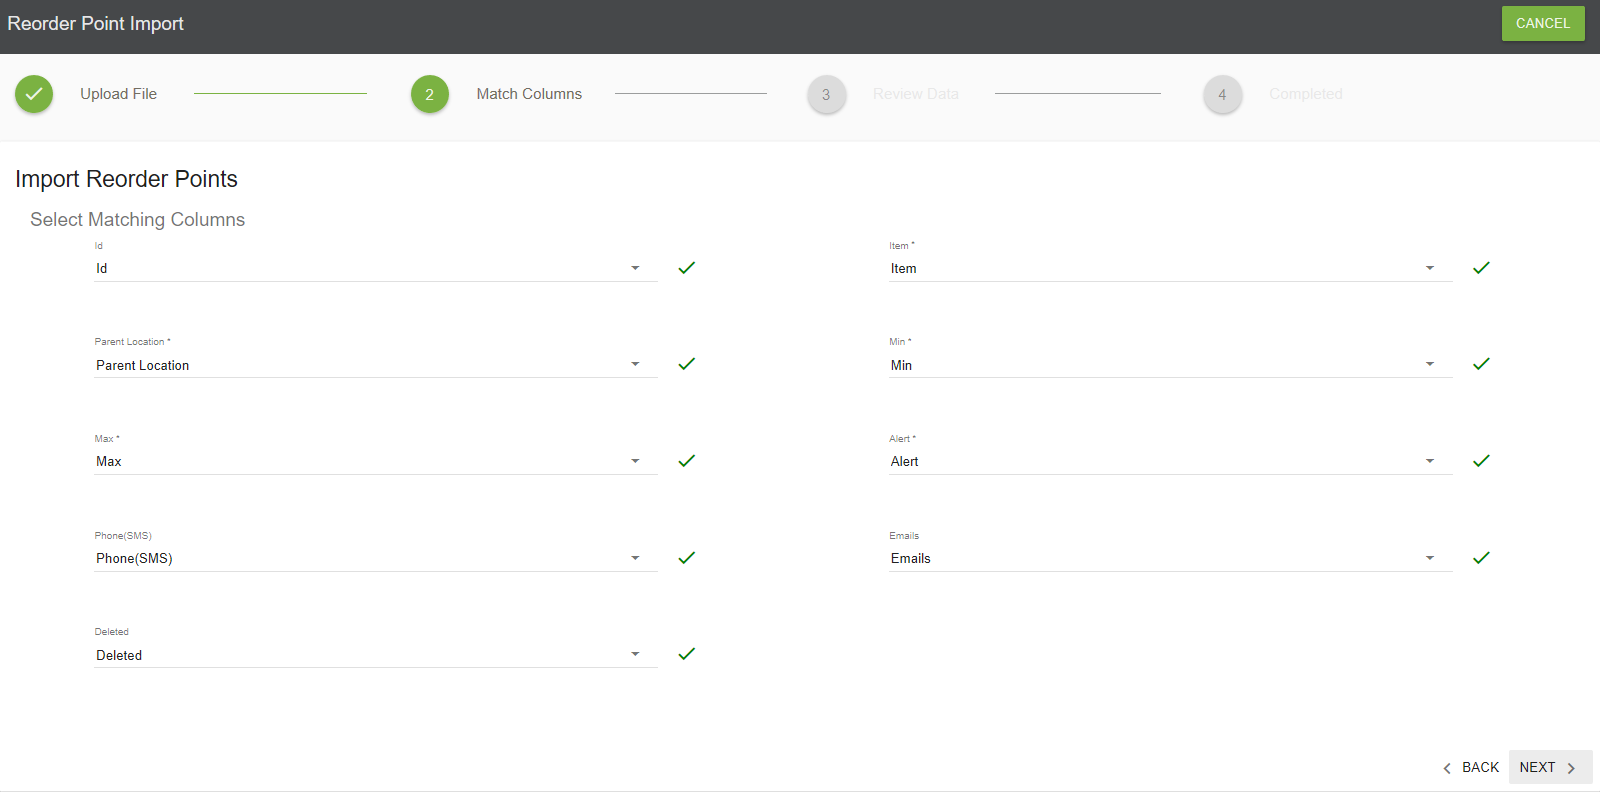
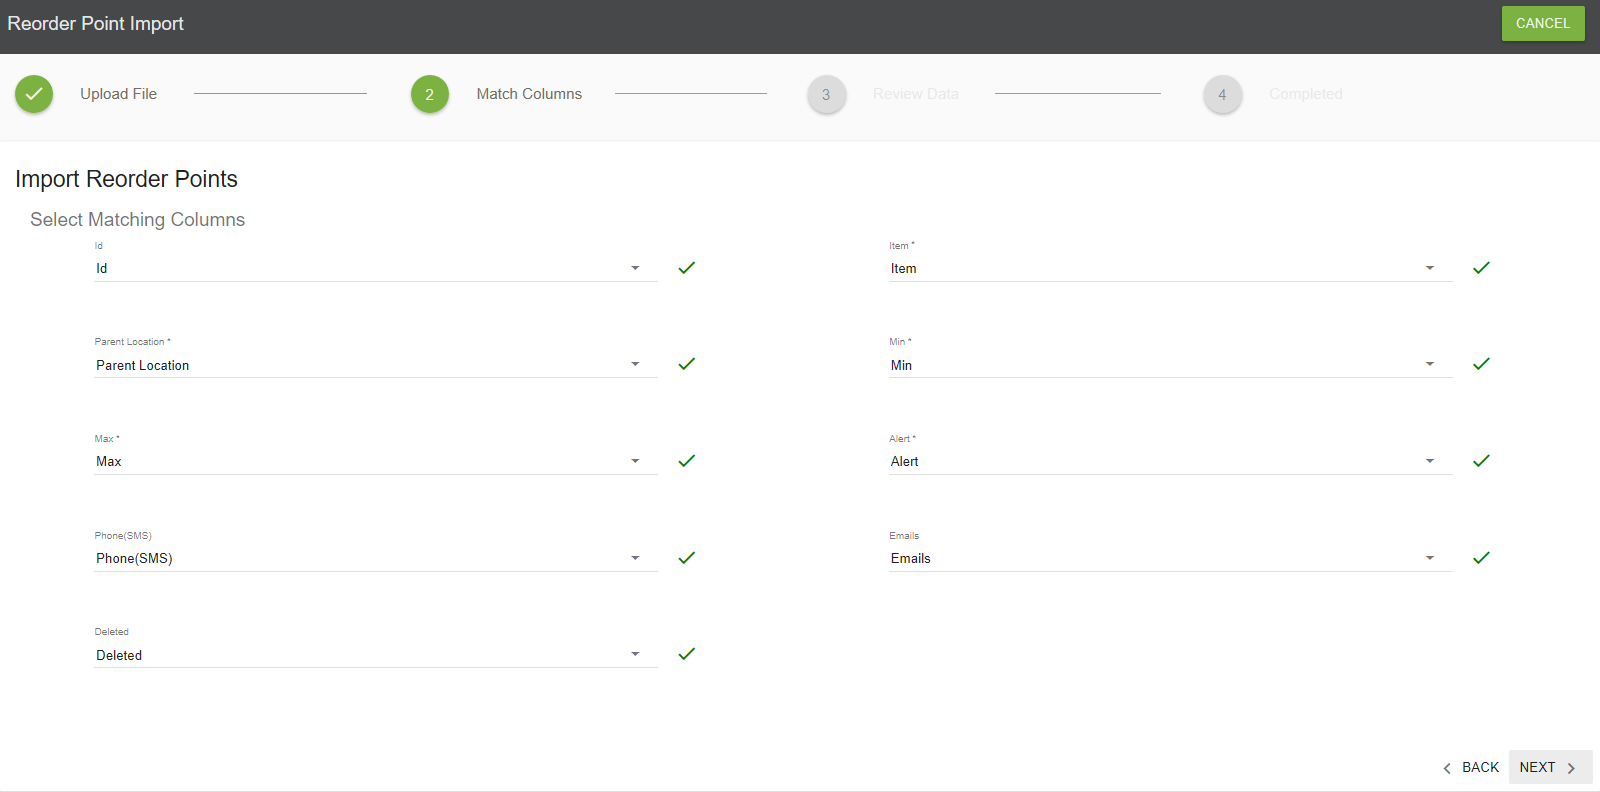
STEP 2: Match Columns
After importing your CSV file, Boxstorm will display the columns to be imported. This allows you to select which columns you want from your file to be assigned to each field. That way, if you have your own column headers, and they don’t match the names of Boxstorm’s default headers, you can specify which header is to be assigned to each field. If there are issues uploading your inventory, you will see what errors you have on the final step. Once the import shows ALL green checkmarks, you are free to click NEXT and move forward in the import process.
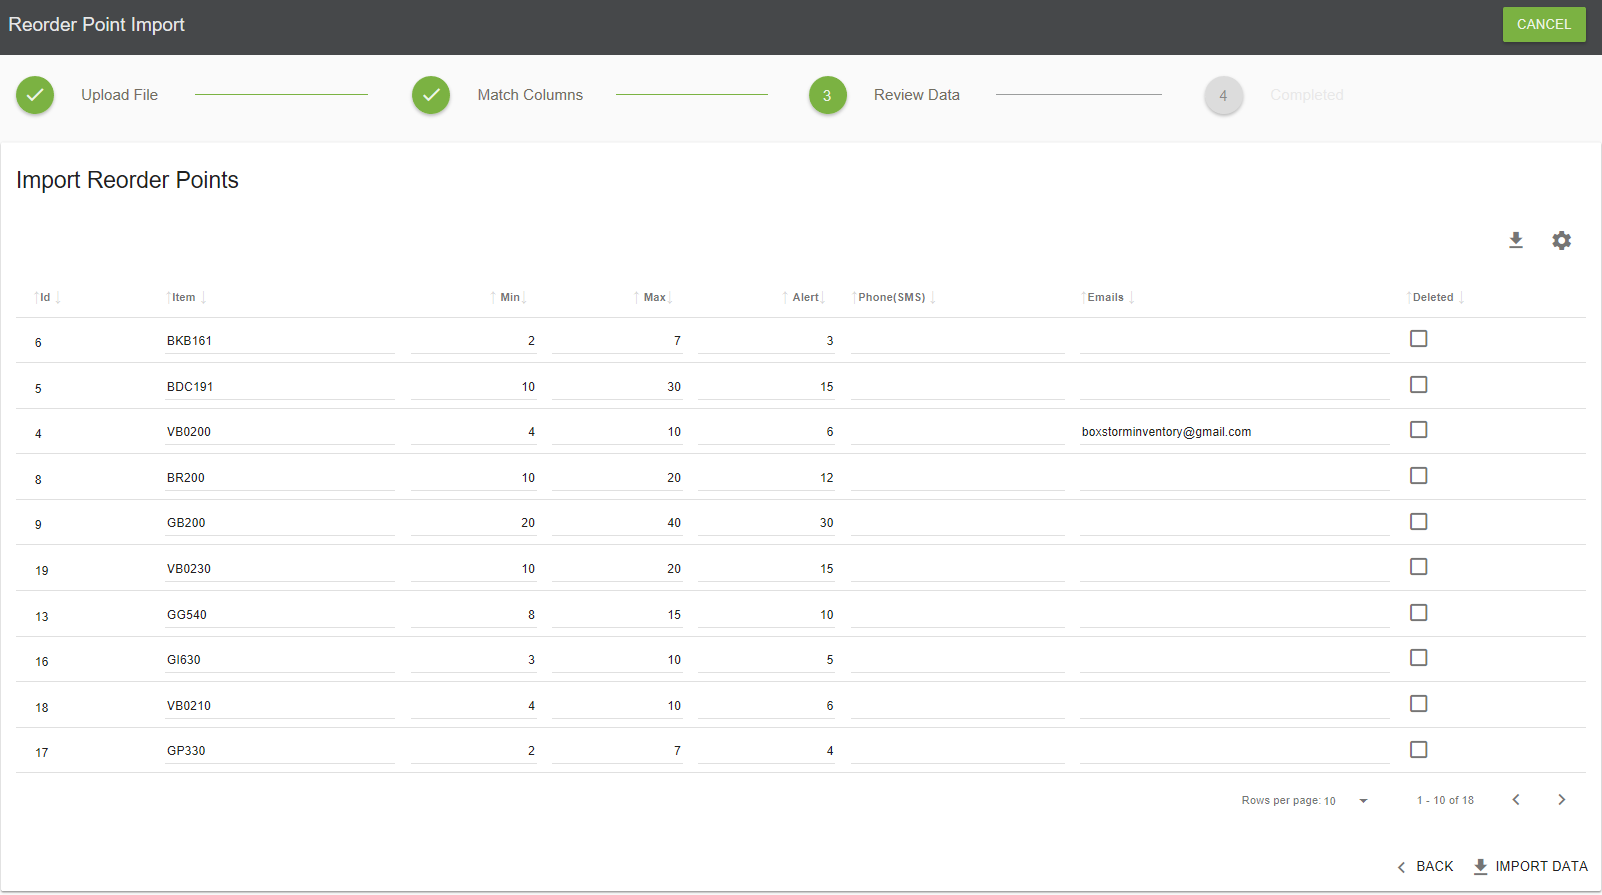
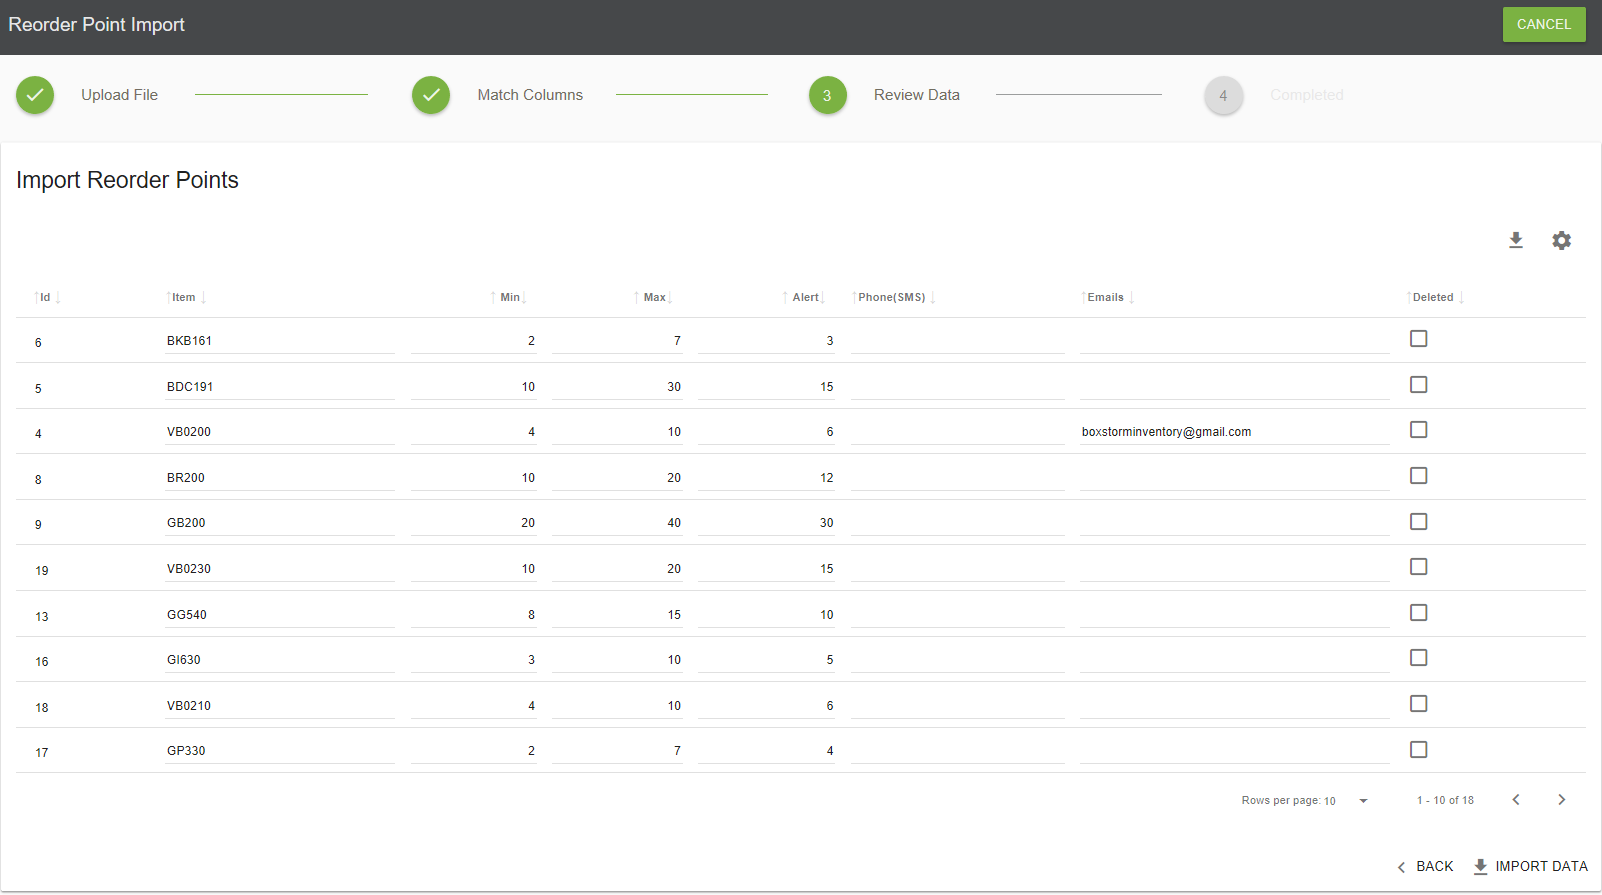
STEP 3: Review Data
At this time, review the import data. This is to ensure that once the formatting has been accepted, the columns and headers match the reorder points you are about to import into Boxstorm.
STEP 4: Import Complete
Your item reorder point import is now complete. You may click DONE and begin using Boxstorm for your inventory management needs.
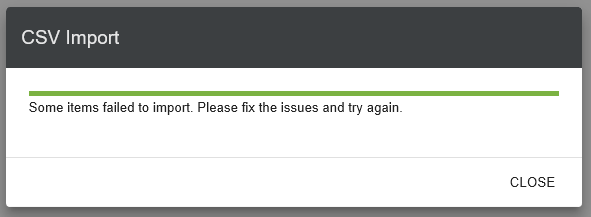
Note: If you encounter an import error, you will be prompted to fix the issues, giving you the associated error message needed for a successful import. Changes can be made on that screen, or you can download a file of just those problem records and change the data there.
Export Reorder Point
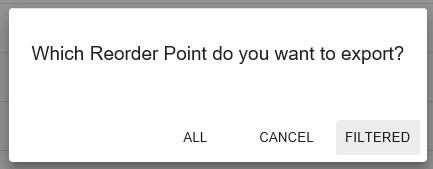
Once you have selected the Reorder Point feature, the following dialogue window will appear. It will give you the option to export ALL items or a FILTERED export.
If you choose to export ALL items, you will be prompted to save or open an Excel spreadsheet with your inventory items and associated data.
If you want to export a smaller inventory set, the FILTERED option may best suit your needs. To filter your inventory, you can enter your description into the Search field and it will auto-populate, or click the FILTER ITEMS button and choose/fill-in from the list of fields displayed. Once you apply the filter, you will be prompted to open or save your filtered export list. This exported list is now available for your external inventory management needs.
