Create a Location
1. The Locations module keeps a record of all inventory locations. The name Location is default but can be customized to your company in the Settings Module | Location Tab.
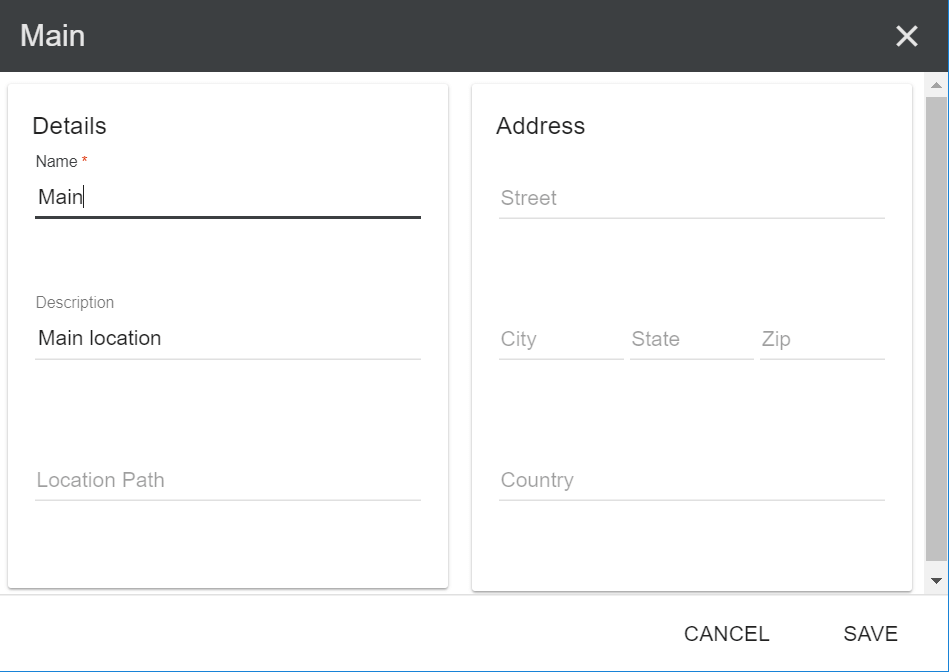
To create a location, click the New button in the upper right hand corner. The name of the Location is the only required information.
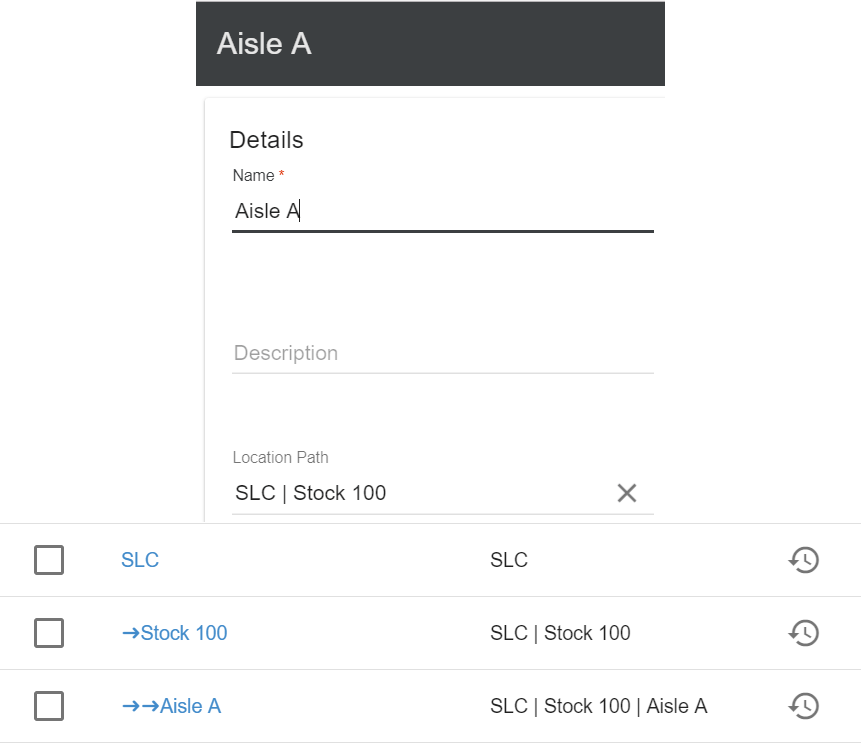
2. The location can be nested inside any other location by selecting a Location Path. The following is an example of nested locations: SLC > Stock 100 > Aisle A. The image left shows how Aisle A would be set up on the Location Path. The image right shows how the Location Path will be shown in the Location Module.
Import Locations
1. Boxstorm offers the option to import Locations using a CSV file. (CSV is a generic format for spreadsheet data. Many applications can export data to CSV or to a spreadsheet, and any spreadsheet application can save a file as a CSV.)
2. To import from a CSV file, click the ![]() icon in the upper right hand corner and select the Import button. A parent location should be created in the file before any Location Paths are created. All Imports provide you with the option to download a sample CSV file. This will help you to see how a file should be formatted so that it can correctly import. You can use this file as a template and delete the information shown for the sample database (recommended), or you can create your own file and add each of the headers needed yourself.
icon in the upper right hand corner and select the Import button. A parent location should be created in the file before any Location Paths are created. All Imports provide you with the option to download a sample CSV file. This will help you to see how a file should be formatted so that it can correctly import. You can use this file as a template and delete the information shown for the sample database (recommended), or you can create your own file and add each of the headers needed yourself.
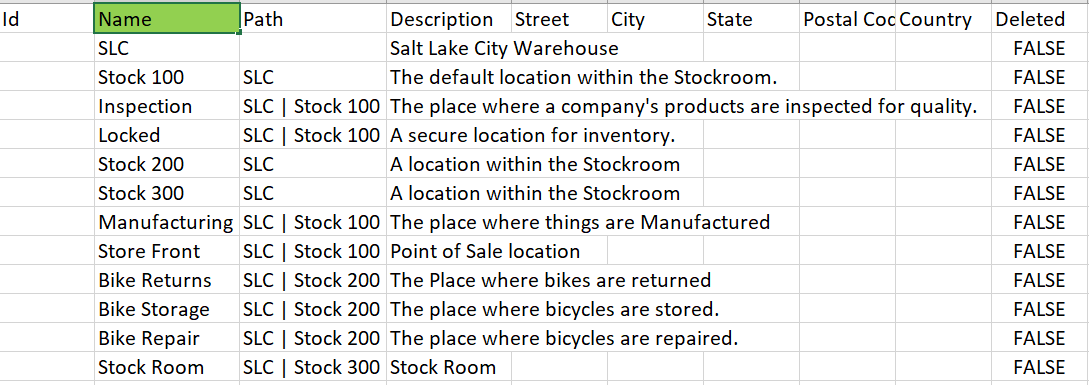
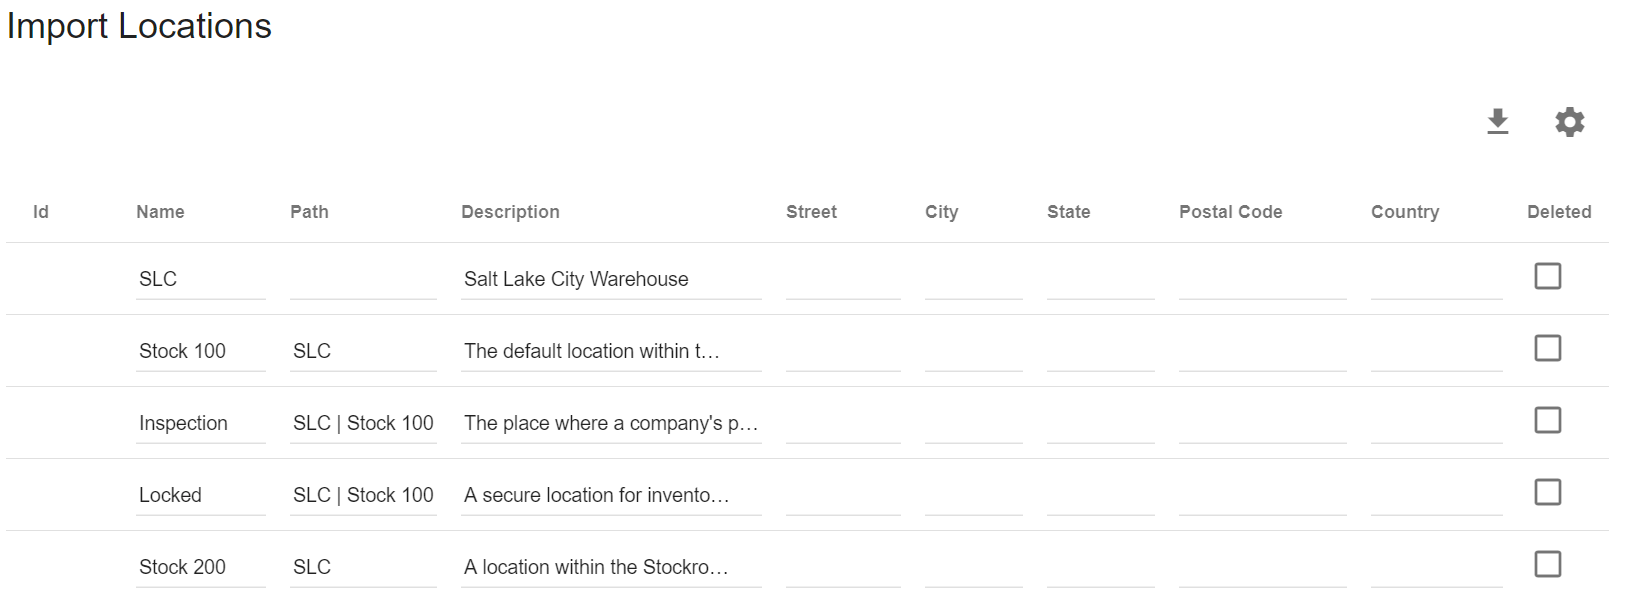
3. The sample file shown below is an example of how your CSV file should be formatted. The only Required information is the Name (highlighted in green). Leave the ID column blank. Boxstorm will auto-fill this column upon import. All of the rest of the information is optional and may be left blank if you choose not to import that data. When creating your own import file we recommend using the sample file and replacing the sample data with your own, thus insuring the file is formatted correctly.
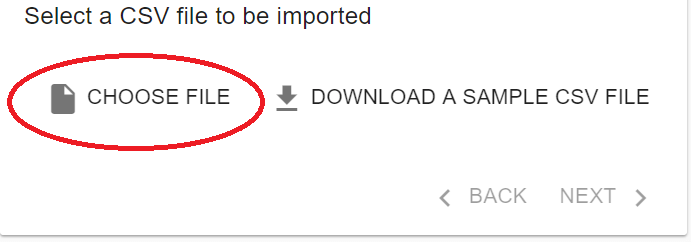
4. After your file is formatting correctly and ready to import, click the ![]() icon and choose Import. Select the Choose File icon and find the location where your import file is stored.
icon and choose Import. Select the Choose File icon and find the location where your import file is stored.
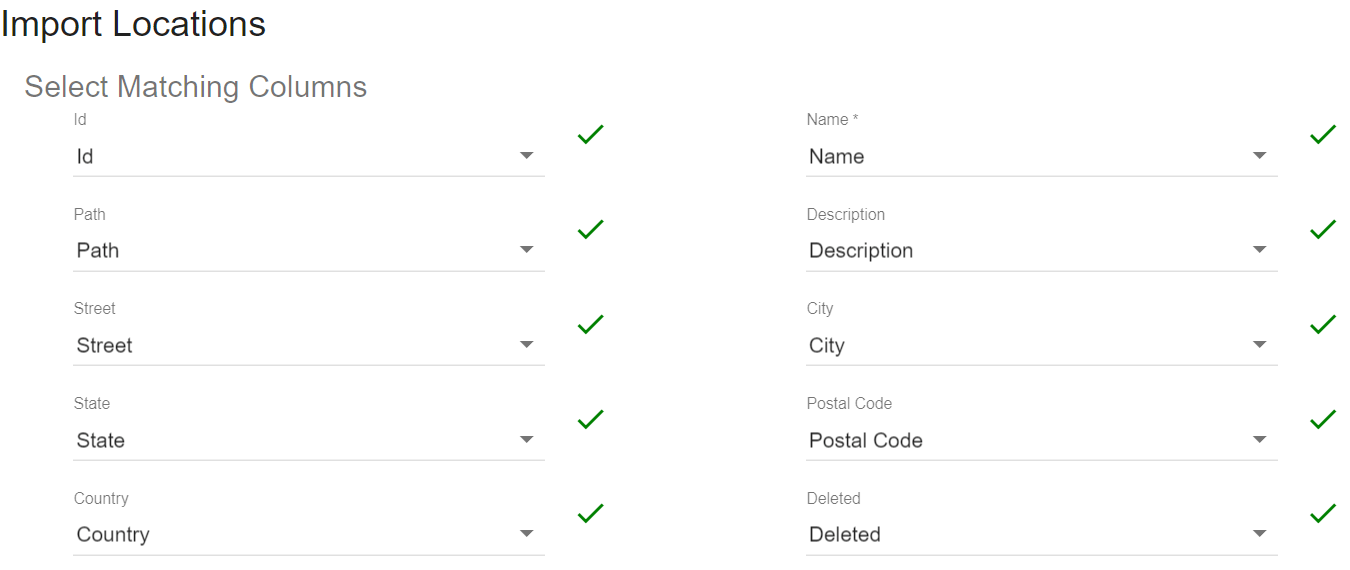
5. Choose Next. The following screen is looking for a match in information. By default, the Name will pull from the Name column, the Description from the Description column, etc. If, however, you choose to map the information to pull from a different column than is default, that may be specified here. A red X means the path needs to be manually fixed, where as a green check means the data is correct and the import may continue.
6. On the next import step a preview of the data is shown. Any last minute changes may be made directly on this page. When the data looks satisfactory, click the ![]() Import Data button. If all information is entered correctly you will receive a “Success!” message.
Import Data button. If all information is entered correctly you will receive a “Success!” message.
Export
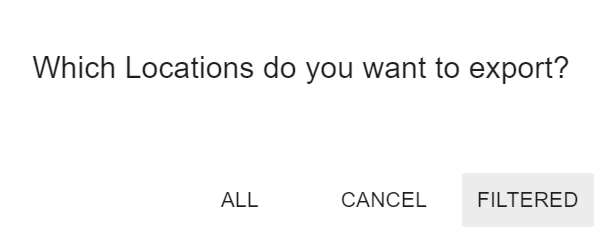
1. To export from Boxstorm, click the ![]() and select Export. You are immediately given an option to export a filtered list, or All Locations. Filtered Locations are pre-set by using the Filter Locations option next to the Search feature (Details on the Filter feature are found on this page).
and select Export. You are immediately given an option to export a filtered list, or All Locations. Filtered Locations are pre-set by using the Filter Locations option next to the Search feature (Details on the Filter feature are found on this page).
2. The Export file will be named “Location.csv” and will default to your Downloads folder. If different settings have been set for your particular computer, the file may export to another location.
Search
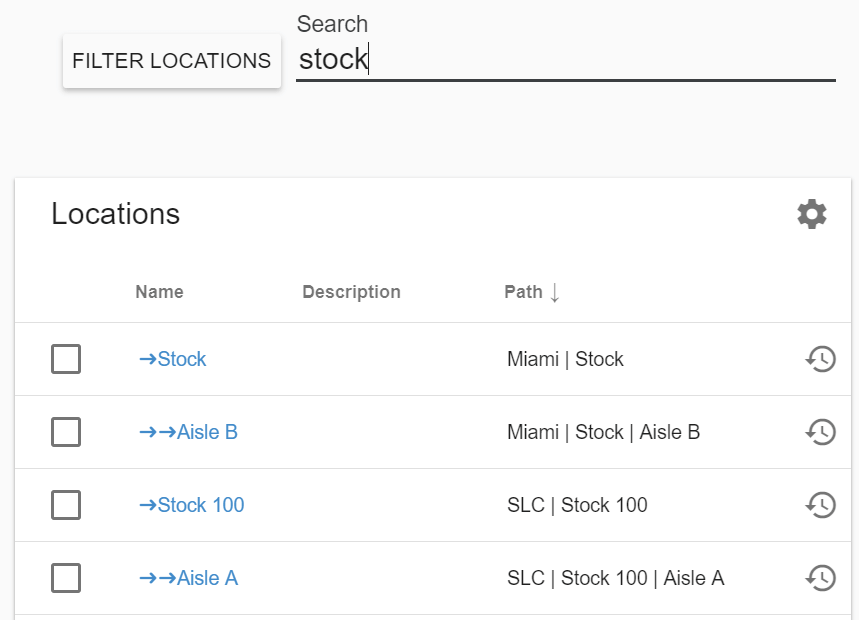
1. To quickly find a specific location, start typing in the Search field. Click a result in the list to open it.
Filter
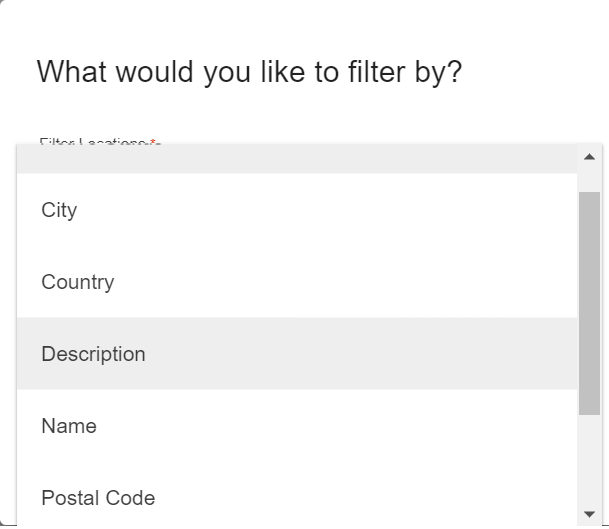
1. To perform a more advanced search, click Filter Locations on the top left side of the screen. Choose the option of what you would like to filter the Location by. To add a filter click Apply.
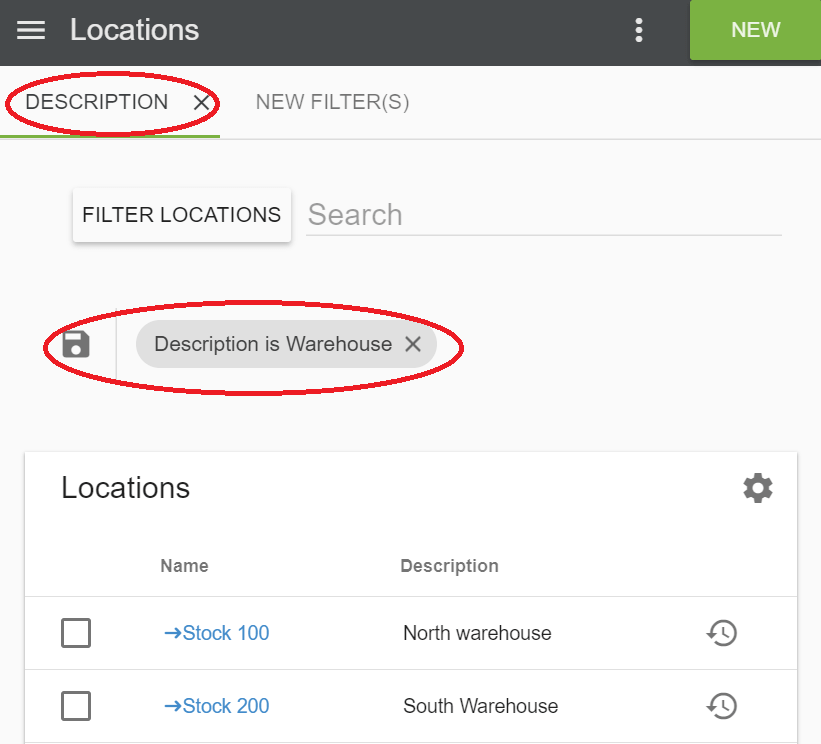
2. When adding filters, multiple filters may be applied. To save a filter for future use, click the ![]() Save button. You will be asked to provide a name for this filter, and it will then appear at the top of the screen where it can be easily accessed. To delete a filter simply choose the X next to its name.
Save button. You will be asked to provide a name for this filter, and it will then appear at the top of the screen where it can be easily accessed. To delete a filter simply choose the X next to its name.
Edit
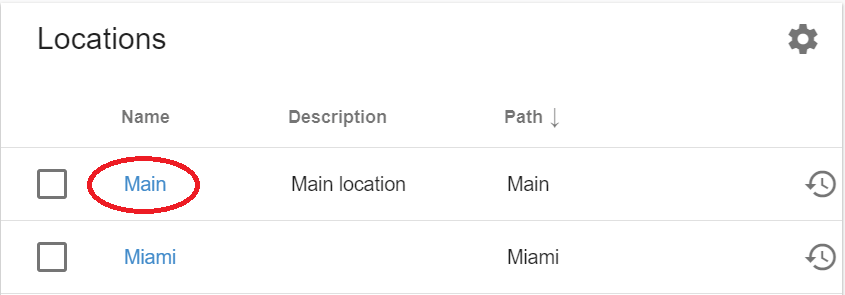
1. To edit a Location click on its name. The blue hyperlink will open the Location details allowing for modification.
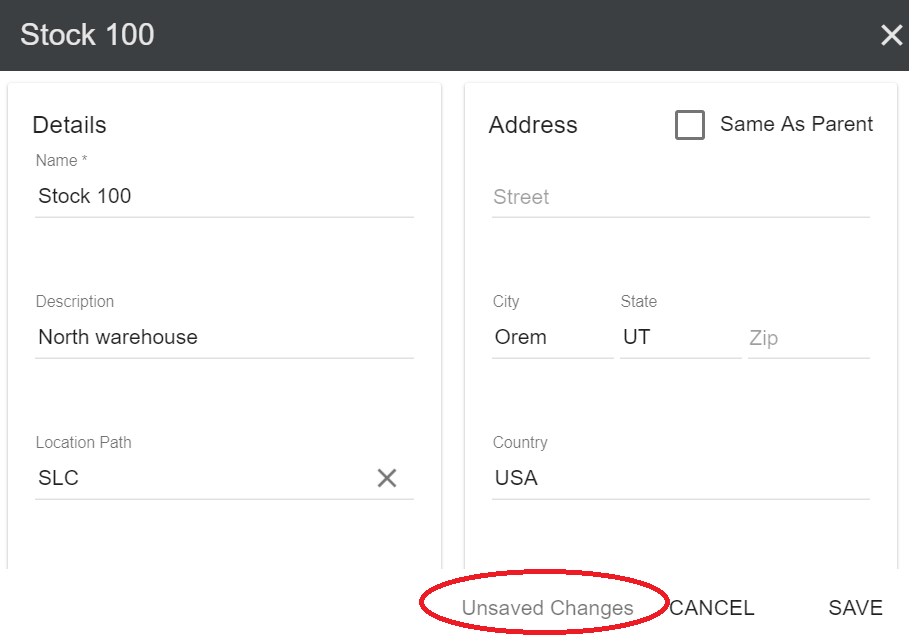
Note: Notice the Unsaved Changes notification will show when the Location has been modified but not yet saved.
1. To see the history of a location, click the ![]() Show History button on the right side of the location. The history list can be filtered using the Search field, and can also be sorted by clicking on any header.
Show History button on the right side of the location. The history list can be filtered using the Search field, and can also be sorted by clicking on any header.

