Vendors
The
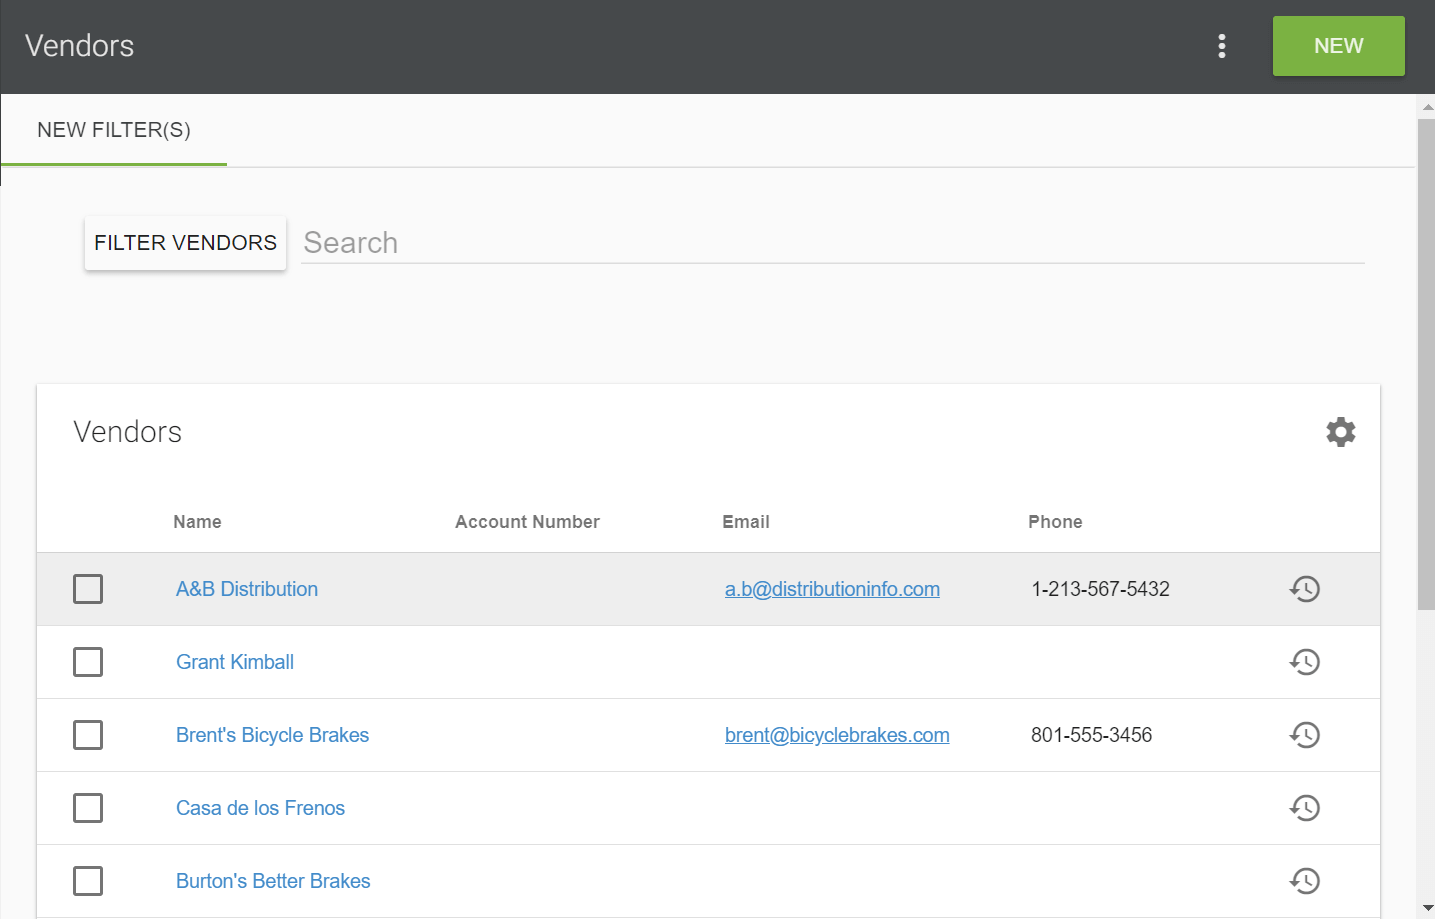
Vendors module stores the list of your company’s vendors. Items are purchased from vendors through the Purchase Orders module. Click the
![]() Column Settings button to customize the columns that are visible, the
Column Settings button to customize the columns that are visible, the
![]() Print button to print the current view, and the
Print button to print the current view, and the![]() Export to CSV button to export the current view.
Export to CSV button to export the current view.
Create a New Vendor
To create a new vendor, click the
New button located in the upper right hand corner of the home page. Thevendor list can also be
imported/exported by using the![]() menu.
menu.
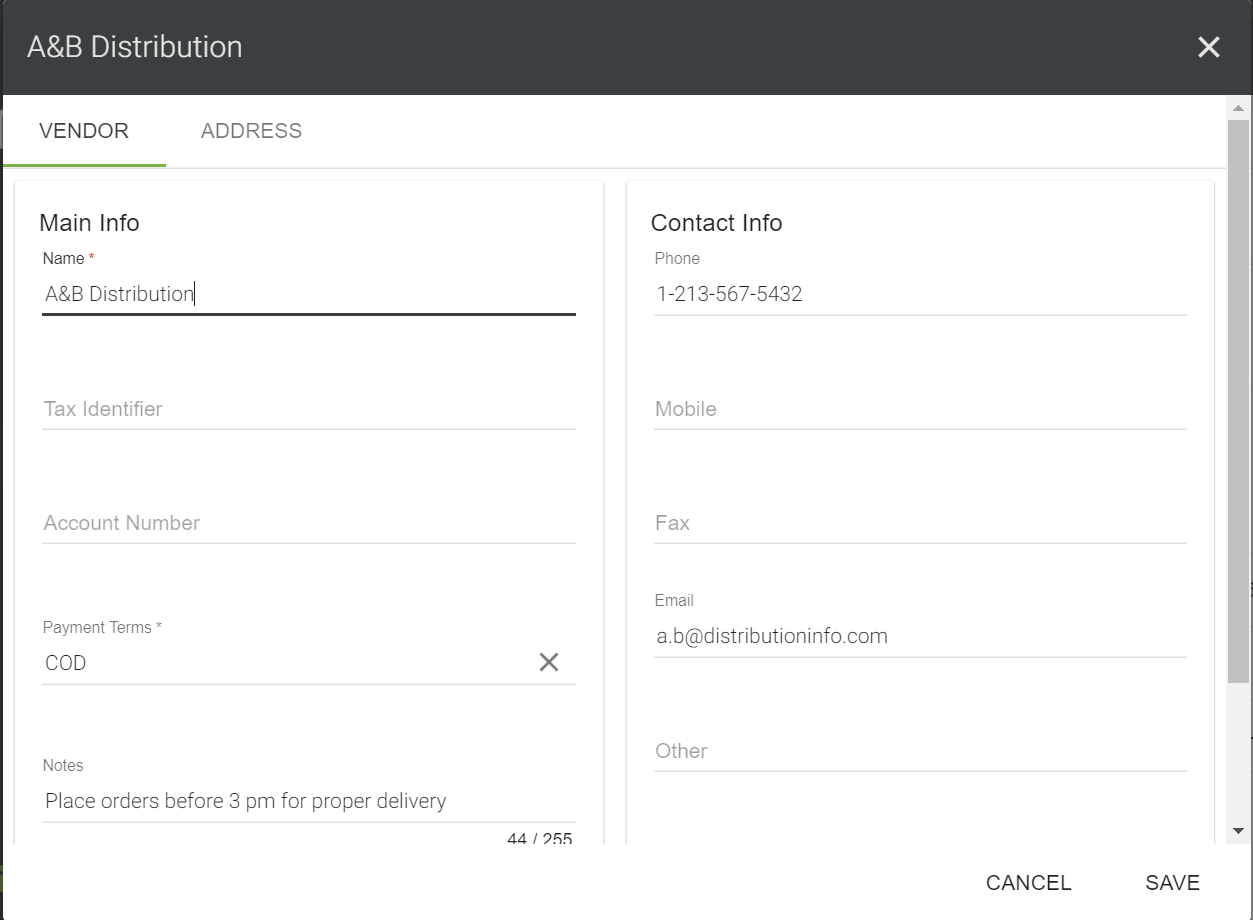
Vendor Tab
The Vendors tab is where you may fill the necessary information for the vendor. Required fields (Name, Payment Terms) are marked with an *asterisk.
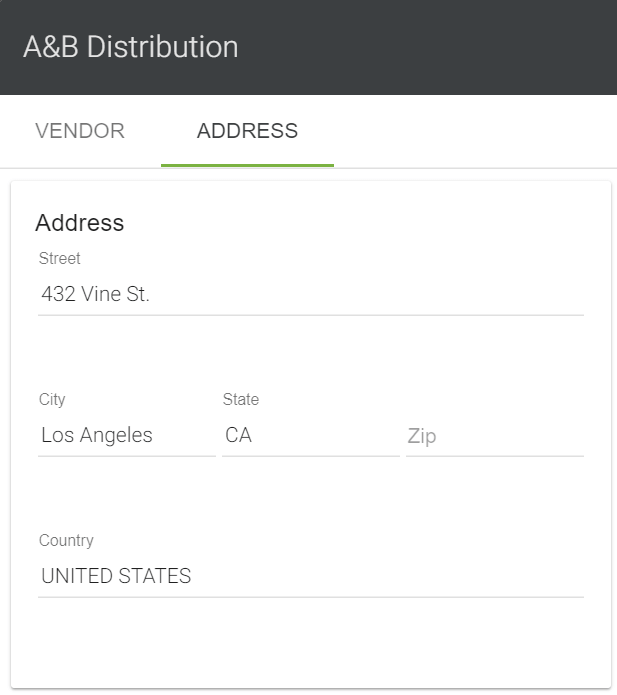
Address Tab
The Address tab keeps the default address for each vendor.

Search for a Vendor
To quickly find an item, start typing in the Search field. Click a result in the list to open it.
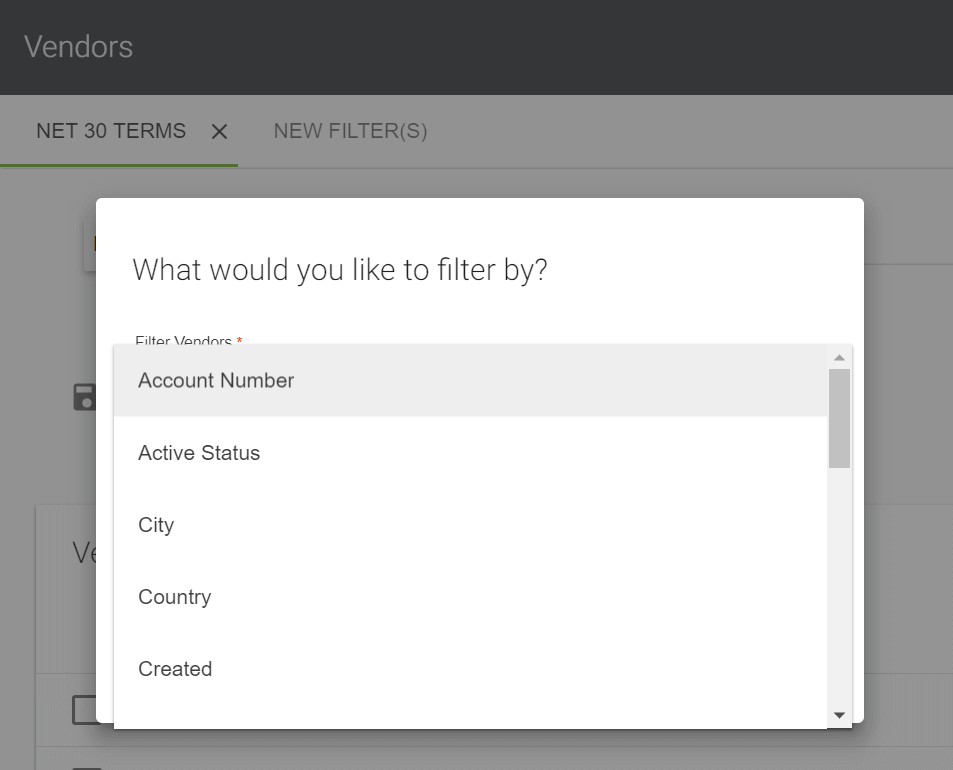
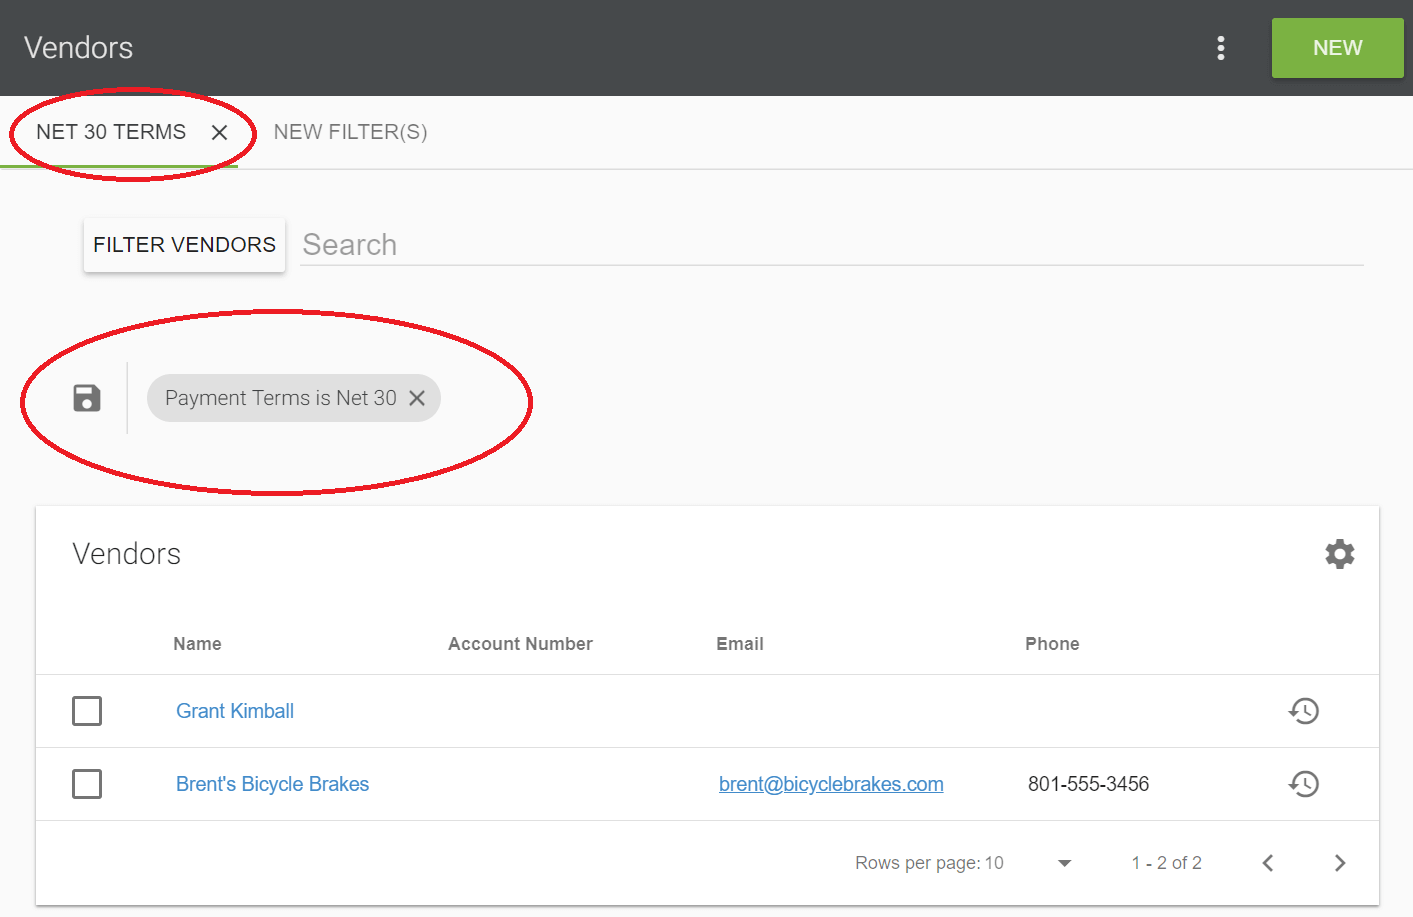
Filter by a Vendor
1. To perform a more advanced search, click the Filter Vendors button on the top left of the page. Select a filter to search by from the list and click the Apply button. Multiple filters may be added at a time.
2.
If a certain filter will be used frequently, you have the option to
save that filter for future use. Simply click the
![]() Save icon next to the filter’s name. This will create a tab for that filter at the top of
the page where it can be quickly loaded again at any time. To delete a saved filter, click
the
X next to the filter’s name.
Save icon next to the filter’s name. This will create a tab for that filter at the top of
the page where it can be quickly loaded again at any time. To delete a saved filter, click
the
X next to the filter’s name.
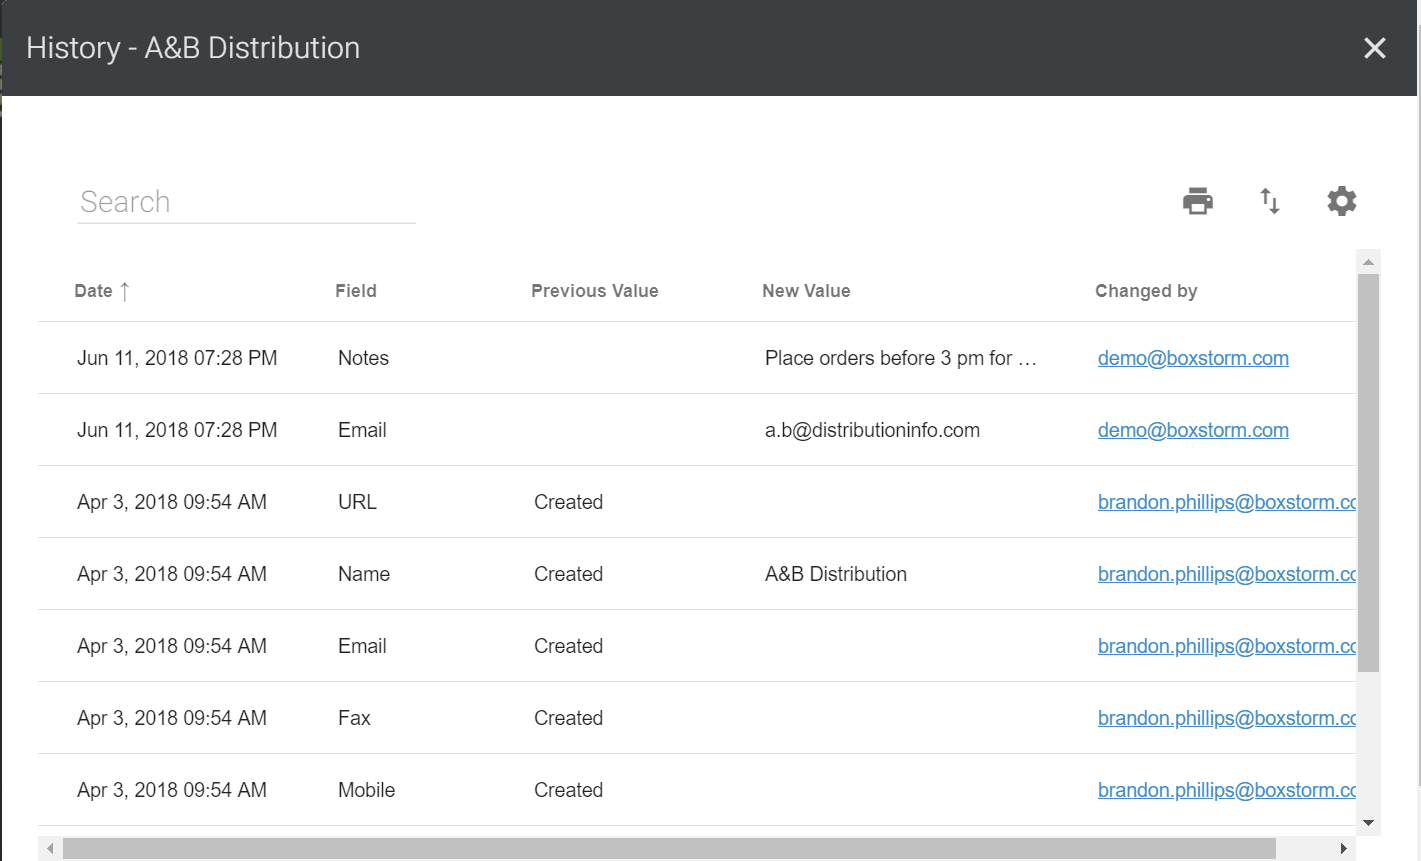
History of a Vendor
To see the history of a vendor, click the
![]() Show History button on the line of the desired vendor. Click the column headers to sort the table,
and filter the lists if desired by using the Search field.
Show History button on the line of the desired vendor. Click the column headers to sort the table,
and filter the lists if desired by using the Search field.
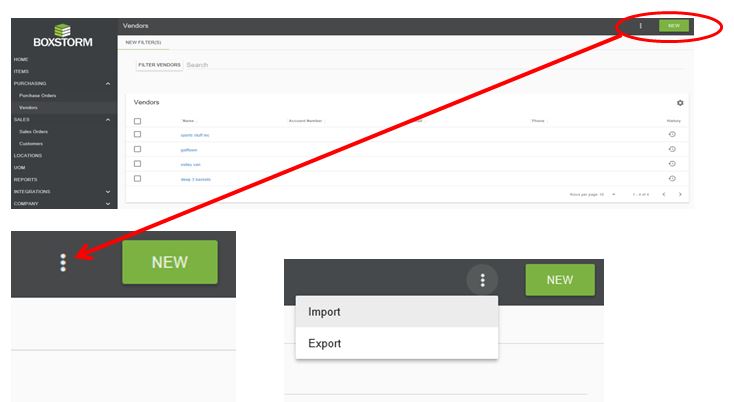
Vendor Imports and Exports
Boxstorm can import and export information through Comma Separated Values (CSV) files. CSV files can be viewed and edited in spreadsheet applications like Microsoft Excel, or in any text editor. Boxstorm can also import data from TXT, XLS, and XLSX files.
- Imports provide a convenient way to bring external data into Boxstorm (update a vendor part list, import an order from an online shopping cart, etc.)
- Exports allow Boxstorm data to be used externally (update a website with product prices, export a list of customers, etc.)
Using Imports and Exports
The following steps outline the basic use of imports and exports. From the Purchasing tab, click the three vertical dots on the top-right of the Boxstorm Client and choose Import or Export. Boxstorm can export the filtered list in the current search or the entire vendor list. The exported spreadsheet can be found in the lower left corner of your screen, or where your downloads are located.

How to Import Vendors
Once you have selected the Import Vendors feature, the following dialogue window will appear. There are 4 steps that need to occur so as to successfully import your vendor file.
STEP 1: Upload File
Choose a file you already have prepared with your vendor list or download a sample CSV file to prepare for upload.
RECOMMENDED: Download the CSV file to make sure that the column headers in your vendor record match the CSV headers to import into Boxstorm with little modification.
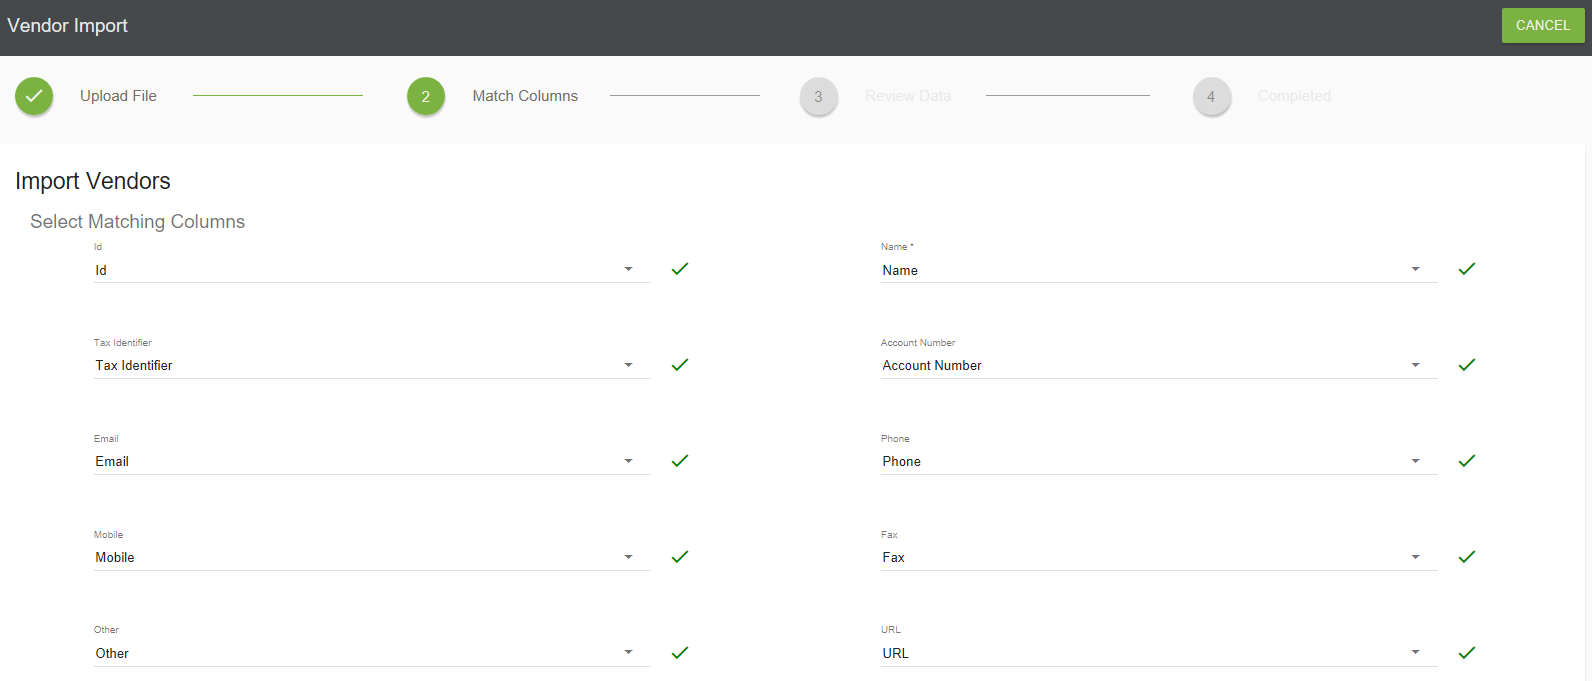
STEP 2: Match Columns
After importing your CSV file, Boxstorm will display the columns to be imported. This allows you to select which columns you want from your file to be assigned to each field. That way, if you have your own column headers, and they don’t match the names of Boxstorm’s default headers, you can specify which header is to be assigned to each field. If there are issues uploading your vendor list, you will see what errors you have on the final step. All required fields need to be selected. Once the import shows ALL green checkmarks, you are free to click NEXT and move forward in the import process.
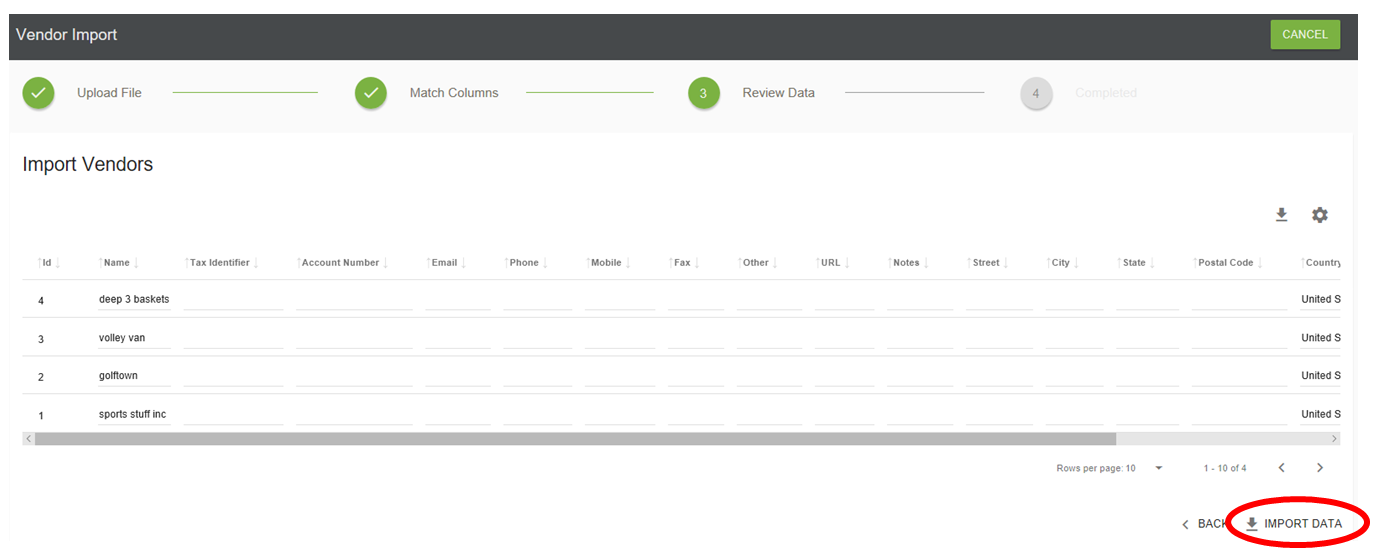
STEP 3: Review Data
At this time, review the import data. This is to ensure that the fields you want to import have been properly selected.

STEP 4: Import Complete
Your vendor import is now complete. You may click DONE and begin using Boxstorm for your inventory management needs.
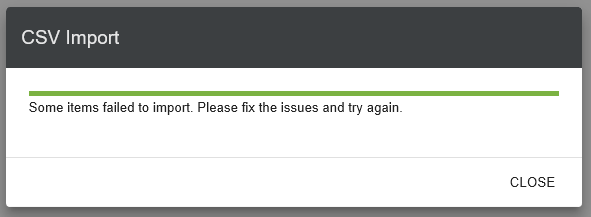
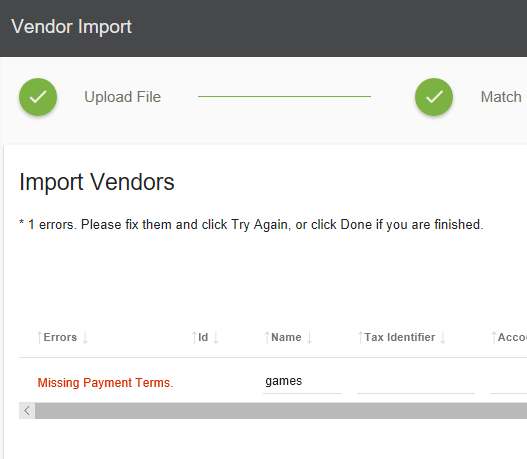
Note: If you encounter an import error, you will see the following windows and be prompted to fix the issues, giving you the associated error message needed for a successful import. Changes can be made on that screen, or you can download a file of just those problem records and change the data there.
How to Export Vendors
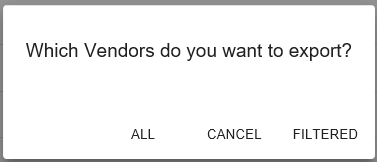
Once you have selected the Vendor Export feature, the following dialogue window will appear. It will give you the option to export ALL vendors or a FILTERED export.
If you choose to export ALL vendors, you will be prompted to save or open an Excel spreadsheet with your vendors and associated data.
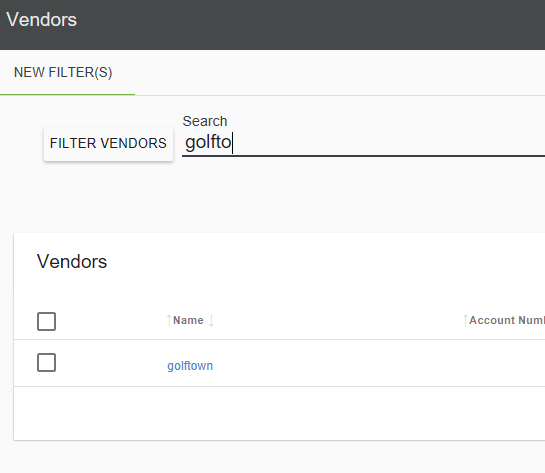
If you want to export a smaller data set, the FILTERED option may best suit your needs. To filter your vendor list, you can enter your description into the Search field and it will auto-populate, or click the FILTER VENDORS button and choose/fill-in from the list of fields displayed.
Once you apply the filter, you will be prompted to open or save your filtered export list. At this point, you are ready to use your exported vendor information in all your application needs.